
The Why
As stated in the onset of this series the goal of this project is to build out Power Pipelines for our Power Platform ALM journey. To start this journey we first need to build out our environments and configure the base pipeline.
Environments
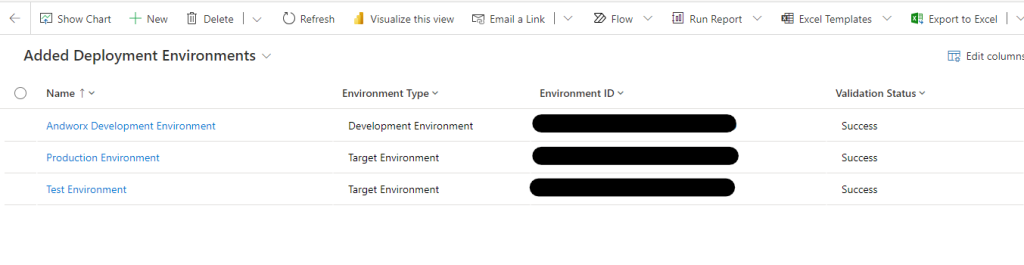
- We will first need to create four environments and write down each of the environments ID
Environment Name Environment Type Environment Management Development Production Unmanaged Test Production Managed Production Production Managed Pipeline Orchestrator Production Managed 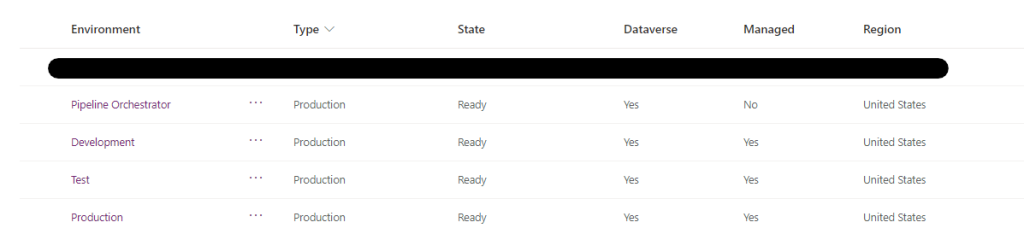
Pipeline
Install Pipeline
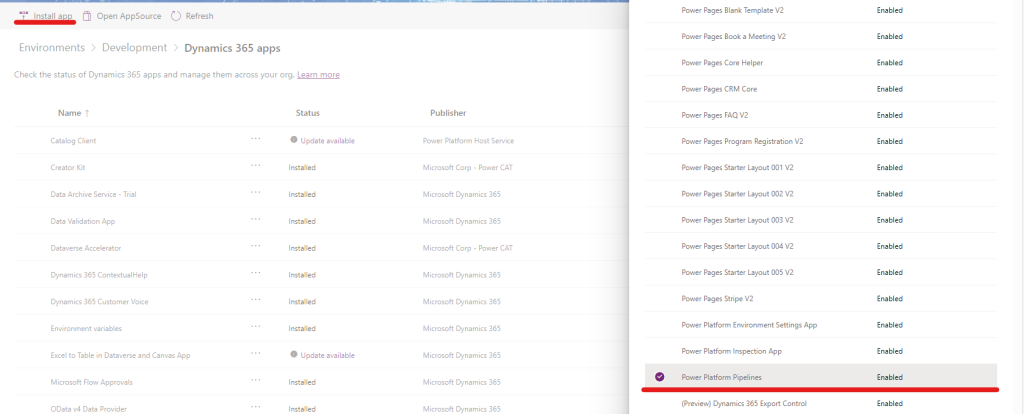
- From the Admin Center navigate to the Orchestrator environment
- Select Resources then Dynamics 365 Apps

- Select Install app then Power Platform Pipelines
💡 This will take some time to install, so maybe grab a coffee.
Configure Environments
Once the Pipeline is installed, navigate to the Orchestrator Environment and launch the Deployment Configuration App
The configuration app is a MDA that will control all aspects of the pipeline
- Navigate to the Environments section on the left had pane of the MDA
- Select New
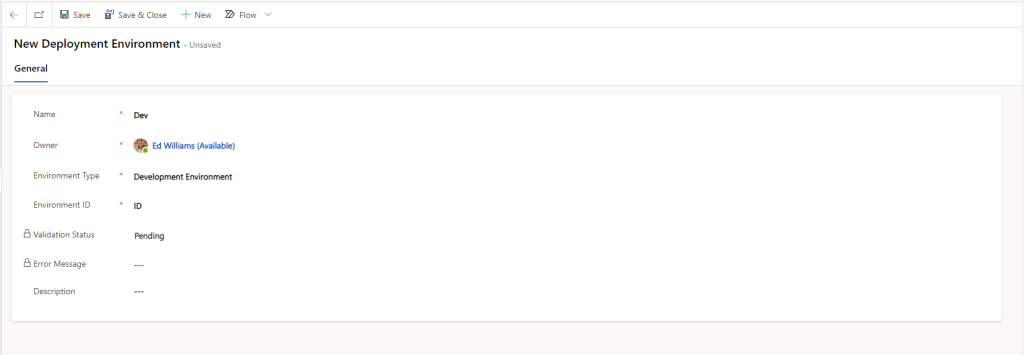
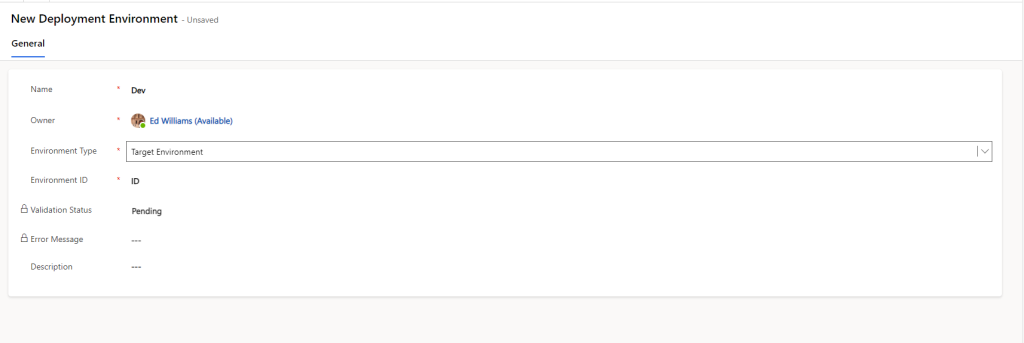
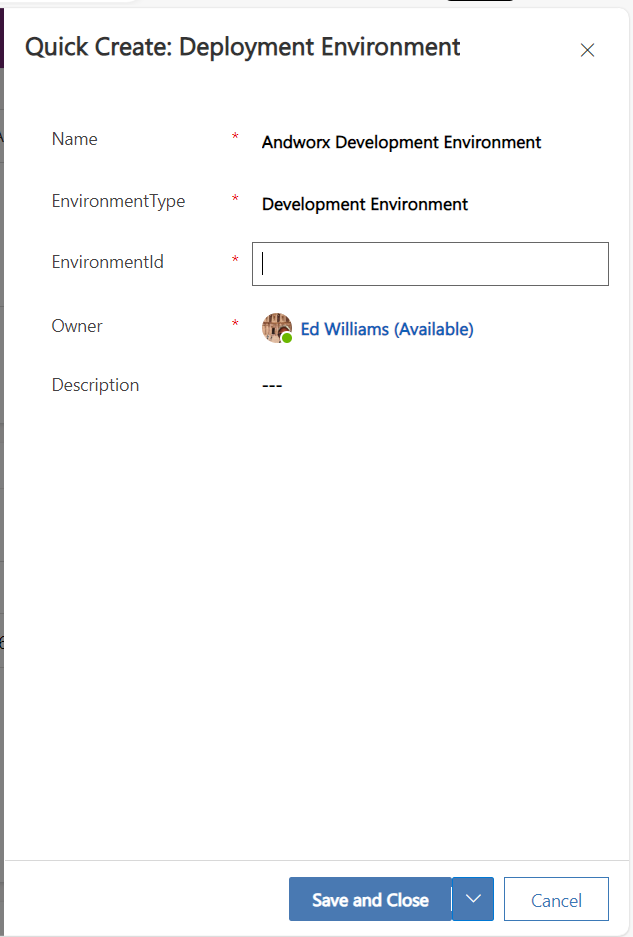
- A MDA form will be shown to enter in the information about each environment .
- Enter in the ID of each environment that was captured earlier.

- For the Development Environment Select the Type of “Development”
- For the Test and Production Environment select “Target Environment ”
- Save each record. Then after a few minutes each environment will display as successfully validated.
Configure Pipeline
With the Environments completed we now need to configure the actual pipeline
- Select Pipelines from the left hand menu.
- Select New at the top
- Give the pipeline a name and a description. Then hit save.

- The ability to add in the environments into the pipeline will now be activated.
- From the development Environment subgrid select new
- A quick create form will appear on the right hand side. Enter in the Name, the type (Development) and the id. Then Save and close the record.
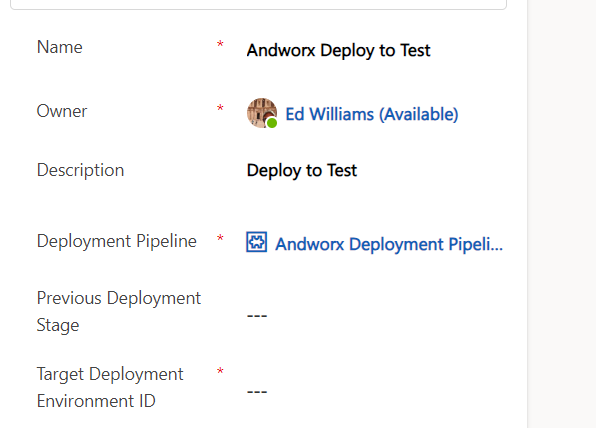
- From the Deployment Stages subgrid, select new. In this new form enter in the name, description, and environment id of the Test Environment. Save and close the record.
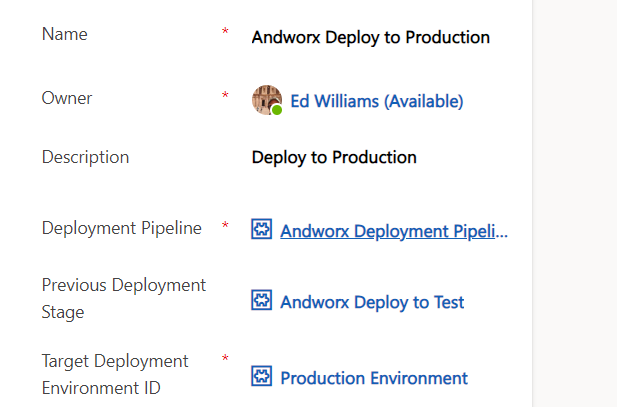
- Again from the Deployment Stages Subgrid, select new.
- In this form, enter in the name, Description, the previous stage (test) and the target stage (production). Save and close the record.
The pipeline is now fully built, but we need to define the roles so that users can actually use it.
Security Roles
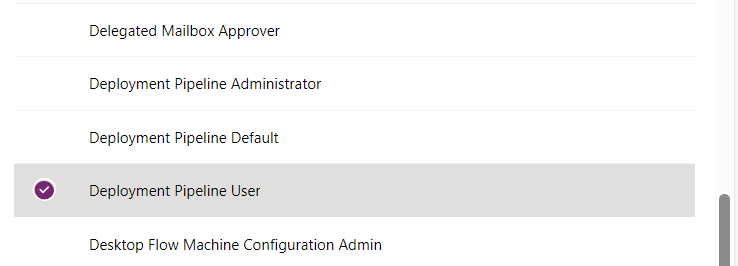
There are two roles associated with Power Pipelines. Deployment Pipeline User and Deployment Pipeline Administrator. To use the pipeline we need to ensure that each of our users has the Deployment Pipeline User role associated with them. My preferred method is to create a a Power Platform Team within the admin center, associate it with an O365 Group, and assign the role to that team. The reason I like doing this is it allows for self service of being granting permissions. For example I can create a Private team in MS teams, this in turn will create an O365 group. Now when a user needs to be granted permissions, I can offload that to their lead by simply letting them put them in the correct team. This is also beneficial because you can give different security roles to team members vs owners. Using this pipeline as an example we can give all users of the team the Deployment Pipeline User, while giving owners of the team both the Deployment Pipeline User and Deployment Pipeline Administrator roles.
- From the Power Platform Admin center navigate to Environments , then the Orchestrator Environment.
- Select Teams from the Access Menu on the right hand side.
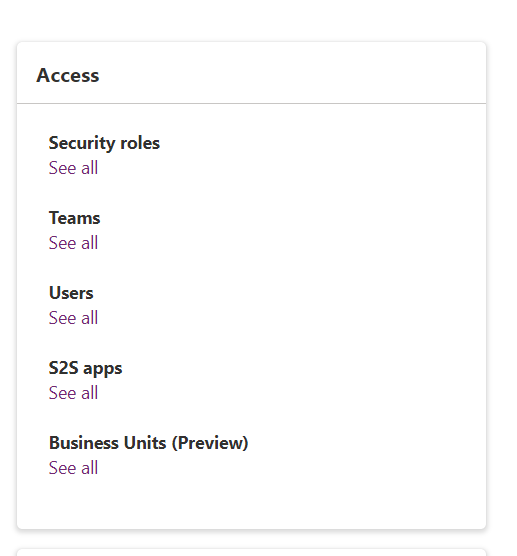
- Select Create Team

- Give the team a name, an Administrator, Select the team type of Office Group, Select the team group (Team) that you want, then select the membership type. Select Next.
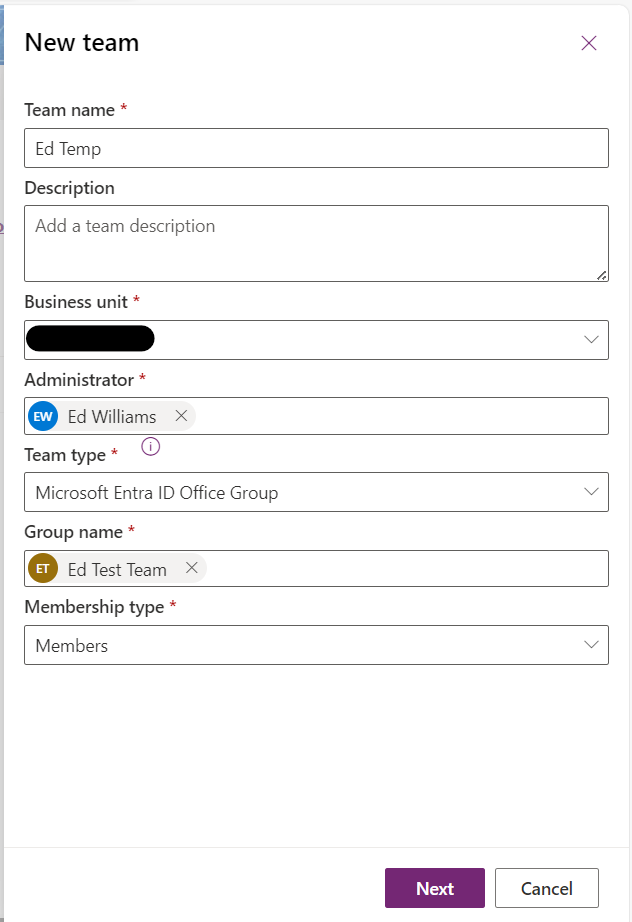
- Give the role the Deployment Pipeline User role. Then select save.
Congratulations! Your pipeline is now configured to run. In the next post we will go over the governance plan and creating a solution register. This will ensure that all solutions are vetted and approved.