2/20/2023
The Why
This section will guide you through completing the canvas app, enabling it to save documents to the SharePoint Document library vs saving it to Dataverse, and marking the file as complete in Dataverse.
The How
This guide is built as thought the SharePoint Document Library Integration has been configured and is live. Use the following guides to properly configure the integration.
App Design
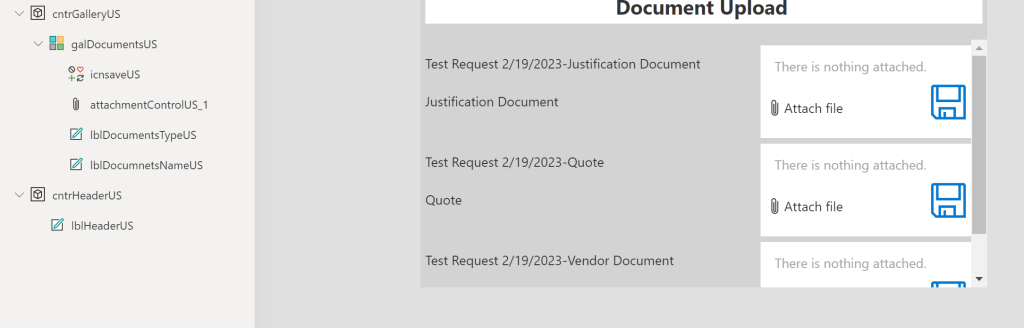
- Add a save icon to the gallery.
- Set the template fill to a IF statement based off of the Completed column.
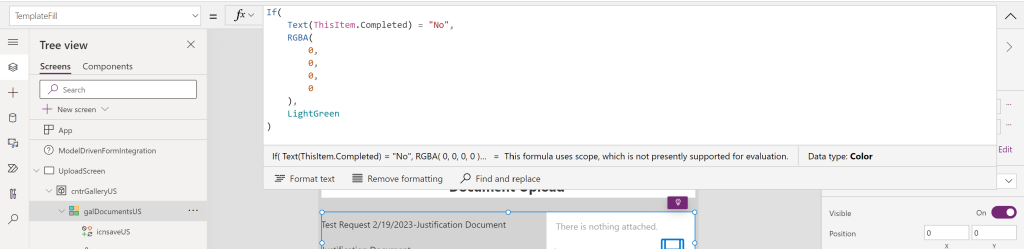
If( Text(ThisItem.Completed) = "No", RGBA( 0, 0, 0, 0 ), LightGreen ) - Set the attachment control to hide if the attachment is marked as completed.
If( Text(ThisItem.Completed) = "No", true ) - To prevent users from uploading files when nothing is attached, we can hide the save icon until a file is attached.
- Select the save icon, set the visible to hidden until an attachment is added
!IsBlank(First(attachmentControlUS.Attachments).Value)Upload form with Automate Flow
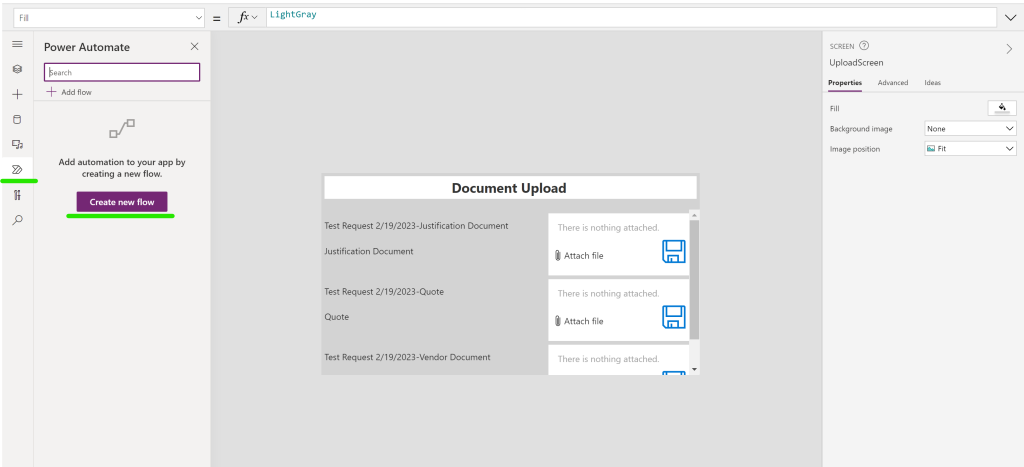
- From the left hand pane create a new flow
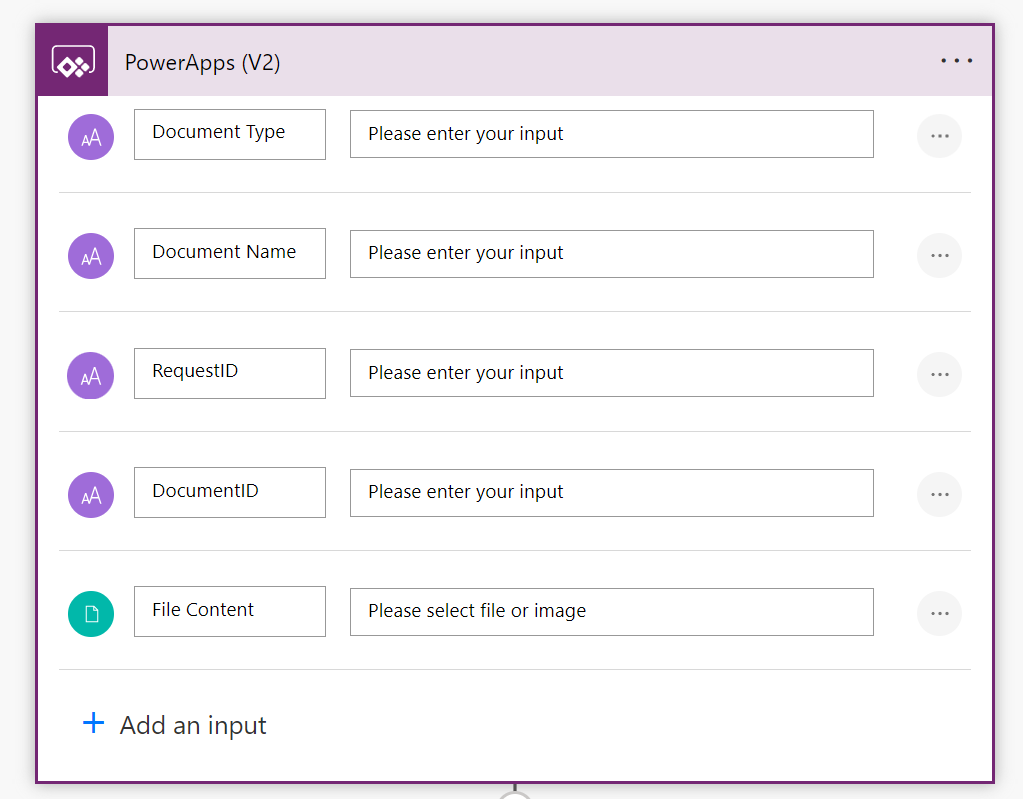
- Delete the Power Apps trigger and replace it with the Power Apps V2 trigger. Add the following items to the trigger
- Document Type
- Document Name
- Request ID
- Document ID
- File Content
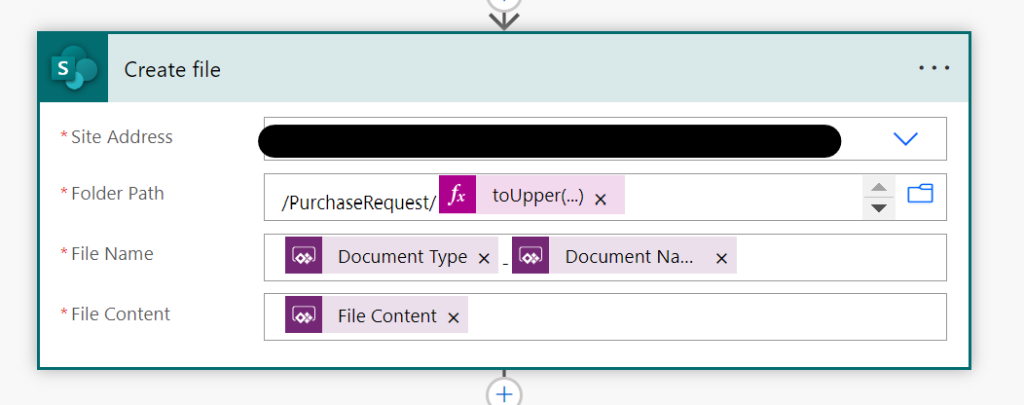
- Add a SharePoint Create a file action
- The SharePoint site will be the one configured for the particular table
- The Folder Path will match the folder path setup during the custom SharePoint link
- The File Name is a concatenation of the Document type and the file name
- The File Content will be the file content from the trigger
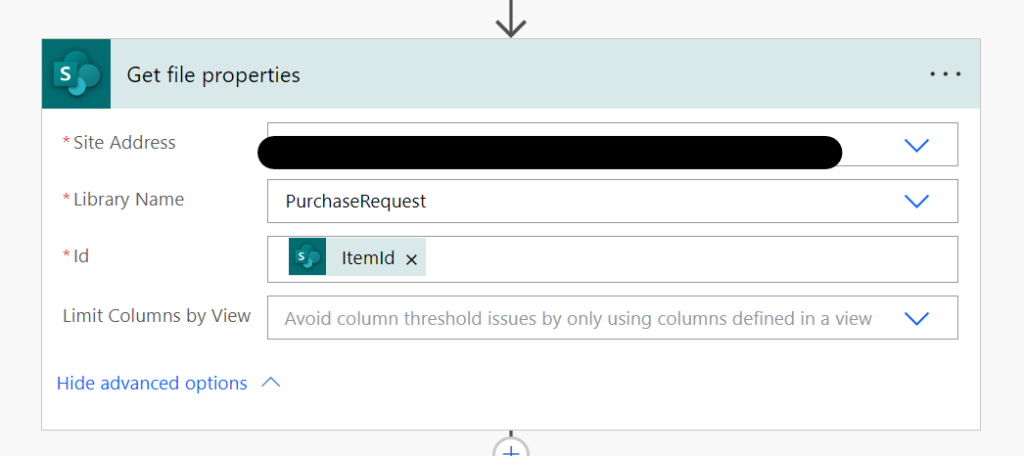
- Add a SharePoint Get file properties action. This action is used to get the SharePoint URL and other attributes
- The Site address is the same as above
- The Library is the same as above
- The Id is the ID from the above action
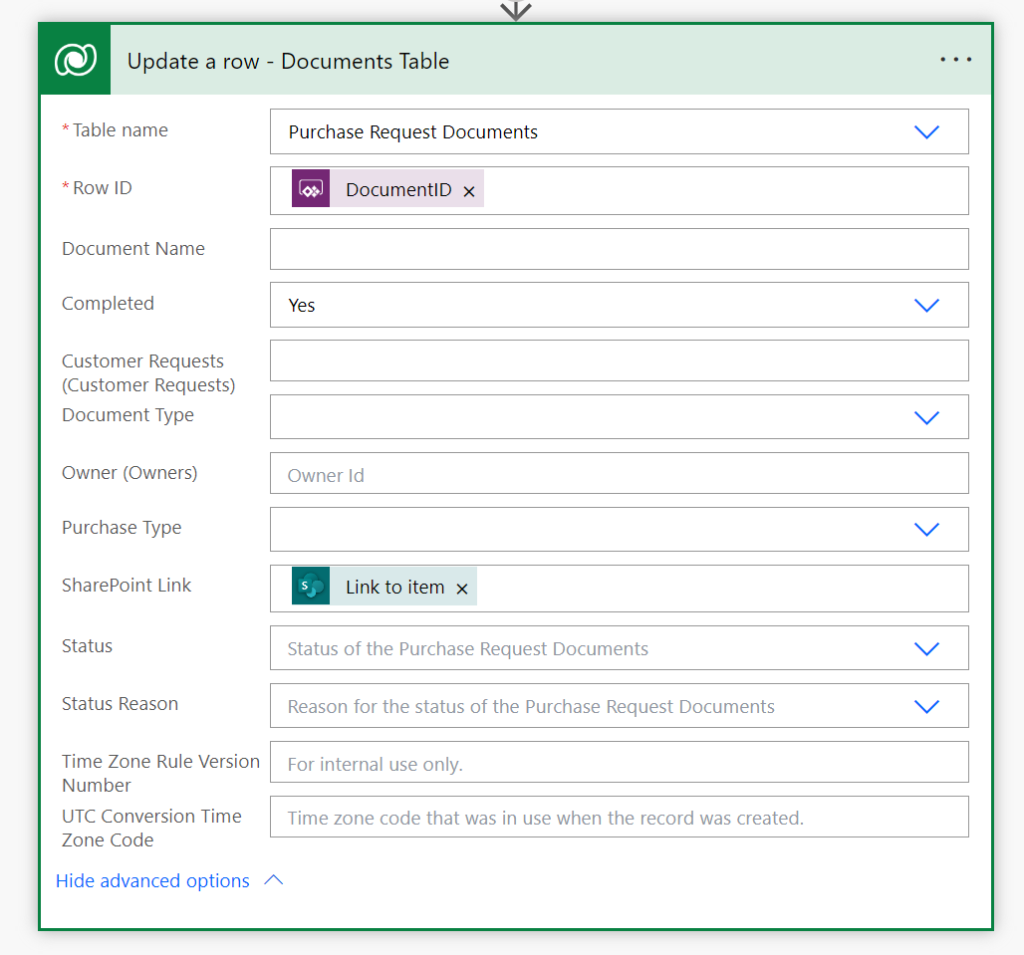
- Add a Dataverse Update a row action
- The Table name will be the documents table
- The Row ID will be the Document ID from the trigger
- The Completed will be marked as “yes”
- the SharePoint Link will be gathered from the above action.
App code
Back in the canvas app we will now finish the app and the code to kick off the flow.
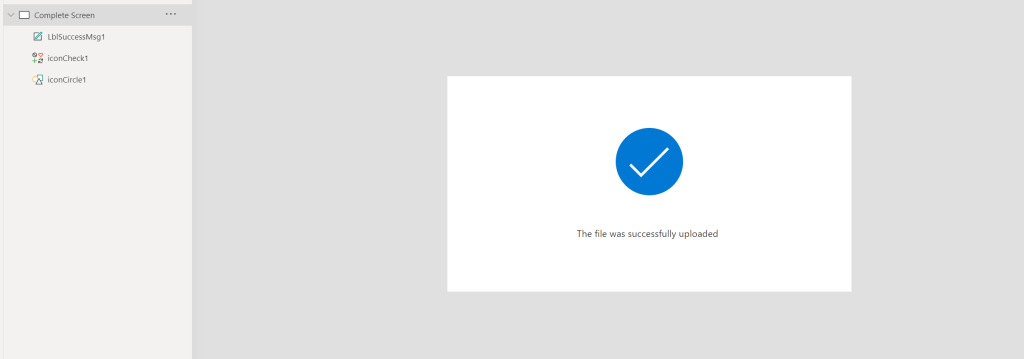
- Add a new screen to the app called Complete Screen
- On the gallery save icon add the following code
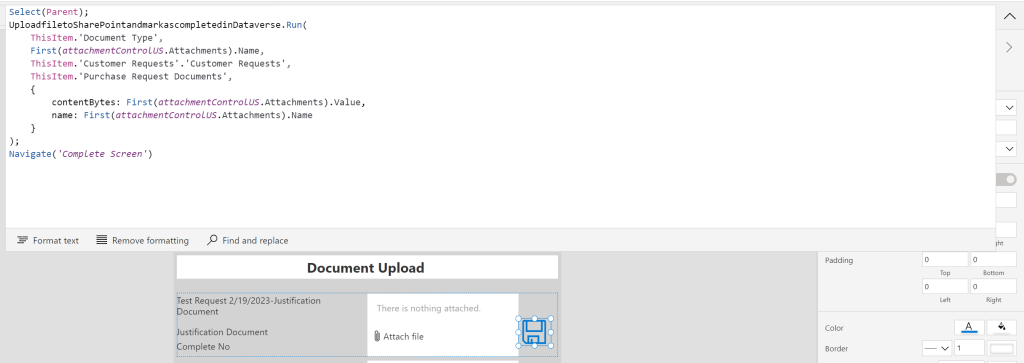
Select(Parent); UploadfiletoSharePointandmarkascompletedinDataverse.Run( ThisItem.'Document Type', First(attachmentControlUS.Attachments).Name, ThisItem.'Customer Requests'.'Customer Requests', ThisItem.'Purchase Request Documents', { contentBytes: First(attachmentControlUS.Attachments).Value, name: First(attachmentControlUS.Attachments).Name } ); Navigate('Complete Screen') - The canvas app is now ready to test.
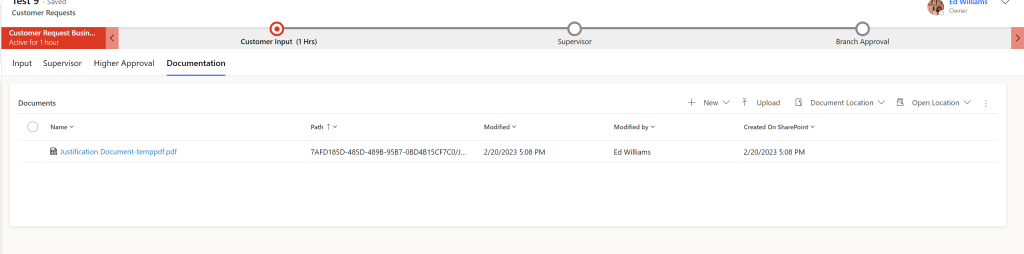
Testing the App
- From the MDA create a new record. The Canvas app along with the documentation location will be displayed/created.
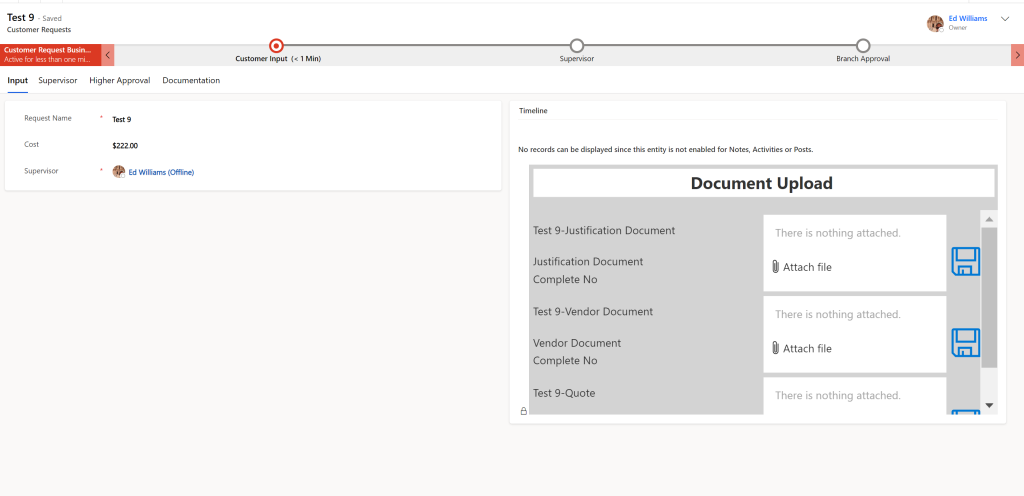
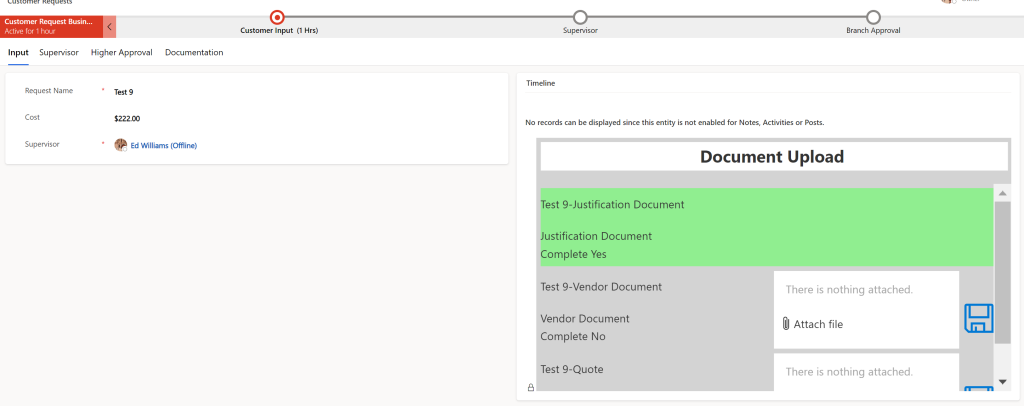
- Upload a file using the document control and verify that the file uploads and is marked as completed.
- The app's core functionality and flow have been completed. Further enhancements can now be made to the UI to improve the canvas app.