I really like to use cards when sending notifications to users Adaptive Cards, however, making complex cards can sometimes be unwieldy with a large card. Additionally, ensuring user output from a card is complex at times. This is where cards for power apps Cards for Power Apps overview - Power Apps | Microsoft Learn comes into play. Cards for Power apps provide a “simple” canvas app interface, allowing users to take full advantage of PowerFX and multiple Datasources. To demonstrate how this all works, I am going to build a card and flow based on a Microsoft Planner board. It will go out each day and get tasks I am assigned, send me a teams message with the card, and allow me to update the task from the card, or navigate to the task and update it.
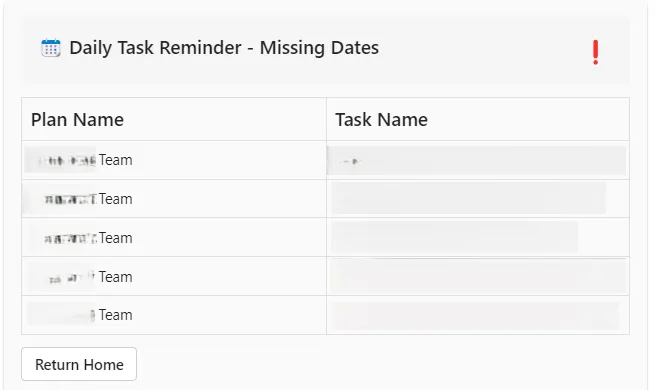
The end product will look as follows:

With the ability to click into each item and see any tasks from that selection.


Building the Card
From a solution, select new card

Give the card a good name and description

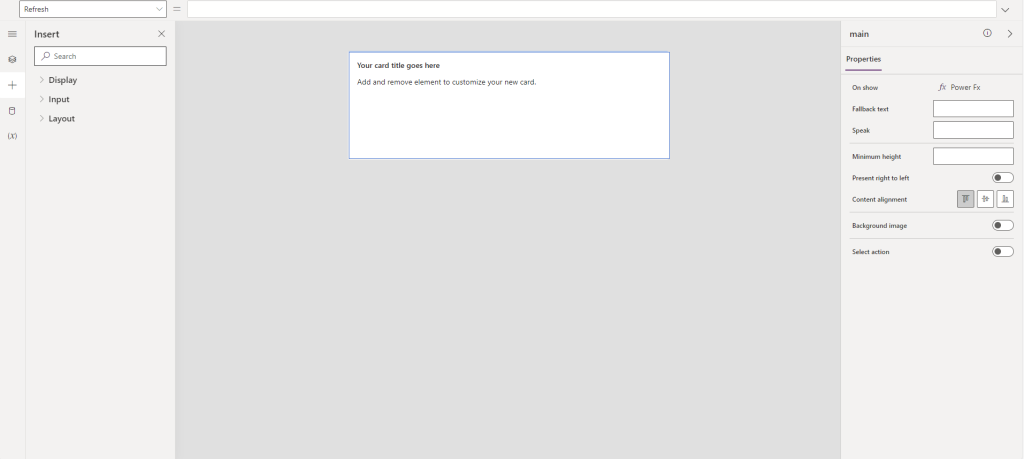
This will give us the core of the card and what it needs to start

💡 If you have ever built an adaptive card in the past you can select JSON in the upper right to see how the card is being created
The Tree view on the left hand pane looks just like the canvas app design studio with one minor difference.

Within each page will be a body and an Actions sections. The body is where the core of the card will go, and the Actions is where buttons can be placed (though they can also be in the body).
💡 You will be tempted to delete the two default text labels, however the card designer is a bit finicky and keeping them in there will help for the time being
Variables
Before getting to work on the card design, the data structure needs to be defined. If we were connecting this to Dataverse we could easily connect this to a Dataverse table(s) and get rolling. But since we are connecting to Planner we need to have the data “fed” to the card via a Power Automate Flow. To get the data into the card we will make a series of variables. From the left hand pane, select variables and create three variables.

- colPlannerNoDates
- Type - Collection
- Columns
- PlanName - Text
- TaskName - Text
- Purpose - Collect all tasks that are missing

- colPlannerHasDates
- Type - Collection
- Columns
- PlanName - Text
- TaskName - Text
- DueDate -Text
- PastDue - Boolean
- Purpose - Collection for all tasks that have a date

- varSelection
- Type - Text
- Purpose - Used to control the visibility and filters of the collections on screens.

Pages
Main
On each card, I like to add a header to announce to the user the purpose of the card. Add a container, two columns, and two text boxes

Set the container style to emphasis.
Within the first text box add the following text
" 📆 Daily Task Reminder " & Text(Now(),DateTimeFormat.ShortDate)
Within the second text box add the following
"🔔"

💡 I find the use of emojis within cards to be extremely useful. I have done images in the past, but find emojis work “better”
Below the container is a column set with three columns. Each column contains two text fields and a button set with one button.

- Past Due Column
- Style - attention
- Width - Stretch
- Header Text
"Past Due" - Value Text Box
CountRows(Filter(colPlannerHasDates,PastDue = true)) - Button Set
- Button Verb
Navigate(hasdates);Set(varSelection, "past") - Title
"View"
- Button Verb
- Today Column
- Style - warning
- Width - Stretch
- Header Text
"Due Today" - Value Text Box
CountRows(Filter(colPlannerHasDates,PastDue = false)) - Button Set
- Button Verb
Navigate(hasdates);Set(varSelection, "today") - Title
"View"
- Button Verb
- No Dates Column
- Style - accent
- Width - Stretch
- Header Text
"Missing Dates" - Value Text Box
CountRows(colPlannerNoDates) - Button Set
- Button Verb
Navigate(missingDates) - Title
"View"
- Button Verb

Has Dates
The has dates page will follow the same format as the first; the container at the top and the columns and the text.

The header text will be as follows
" 📆 Daily Task Reminder - " & If(varSelection = "today", "Due Today","Past Due")
The header icon will be
"🕔"
To view the actual data, a table is added. Within the table three columns and two rows are used.


Each row will contain a text box. The first row will serve as the header for the table. For the second row set the data as follows.
If(varSelection= "today", Filter(colPlannerHasDates,PastDue = false),Filter(colPlannerHasDates,PastDue = true))
This will create a row for each item in the collection when data is present.
To display the data simply use PowerFX in each text box
ThisItem.PlanName
ThisItem.TaskName
ThisItem.DueDate
Finally, in the Actions section, add a single button that will return the user to the main screen.
Navigate(main);Set(varSelection,"")
Missing Dates
The missing dates page will follow the same style as the has dates page. However, there will be no date column added to the table.

The data for the second row will be the collection with no dates
colPlannerNoDates
Power Automate Flow
This flow will trigger everyday and uses the Lists my tasks from the Planner Connector

Then to ensure that we only get tasks that are in progress or not started add a filter array.


@not(notequals(@{item()?['percentComplete']},"100"))
Two array variables are then created

Then for each loop will be added using the body of the filter array

The first step within the loop will be to reach out and get the plan name using the graph endpoint
💡 This has to be done because when listing “My Tasks”, only the ID of the plan is given and not the name.


Then a condition that check for missing dates is added


If the condition is false the array varMissingDatesTasks is appended


If it is true, a condition will be added to check if it is past due.


If true the array variable varTasksHasDates will be appended to


string(formatDateTime(item()?['dueDateTime'], 'yyyy-MM-dd'))
If it is false, a third and final condition will be added to check if the date of the task is today.


Then the array varTasksHasDates will be appended again except the Past Due Column will be false.


After the loop, a generate card action is added. In the action, the card created earlier is selected and the two arrays are added as inputs.


Then a final action is added that will post the card to the user in a chat


