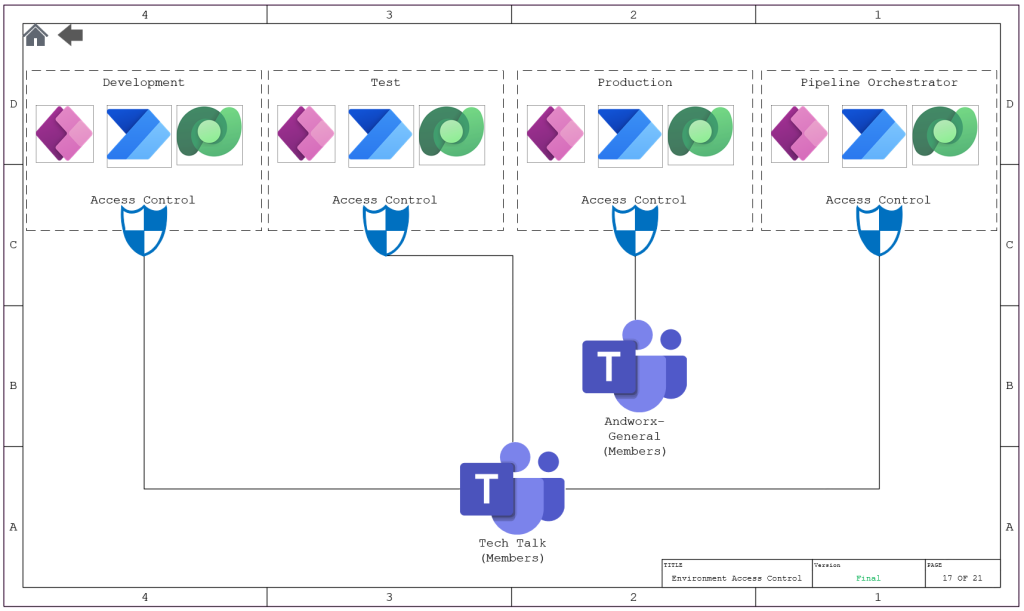
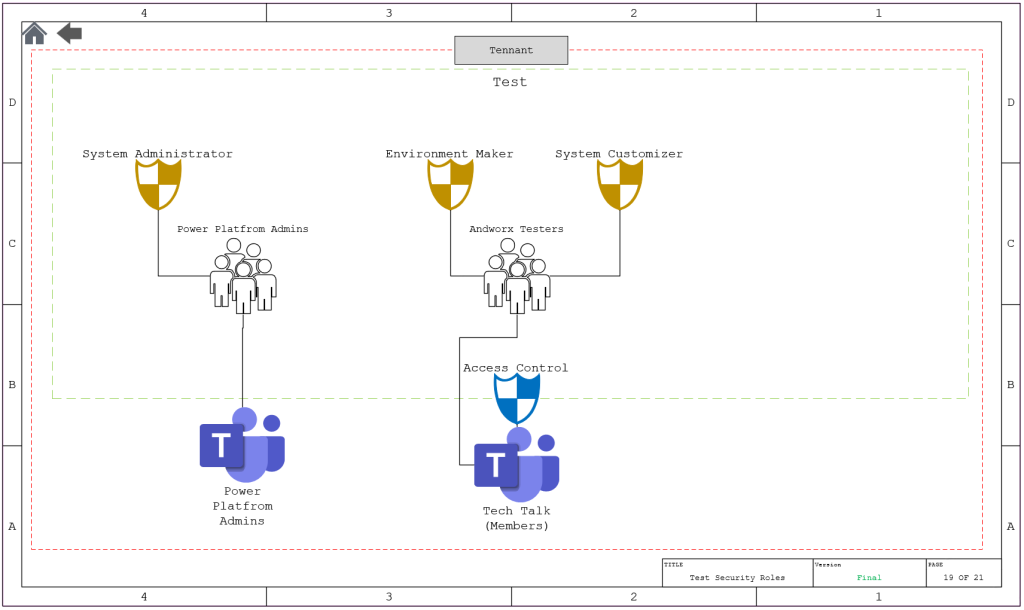
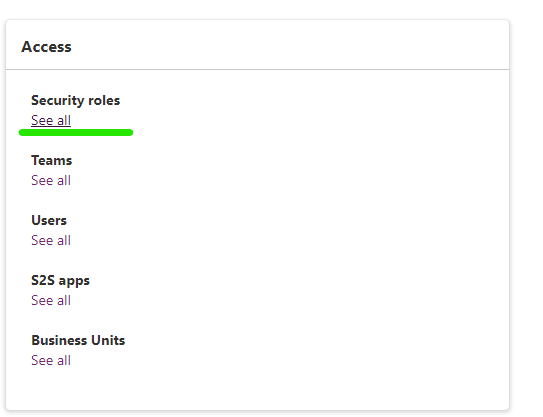
Access Control
Before we get into the specific security roles, we need to define the Access Control to each Environment. The below diagram is an example for how I have fashioned it for my company. I am using O365 groups for ease of access and for future auditing,
Creating Teams in an Environment
Development Security Roles
Design
The Development Environment utilizes the same O365 group for the Environment Maker role and any custom security role needed in the Environment. The System Administrator is aligned to a O365 Group as well. This was done for simplicity on our side, but could be very easily swapped to an Security Group if needed.
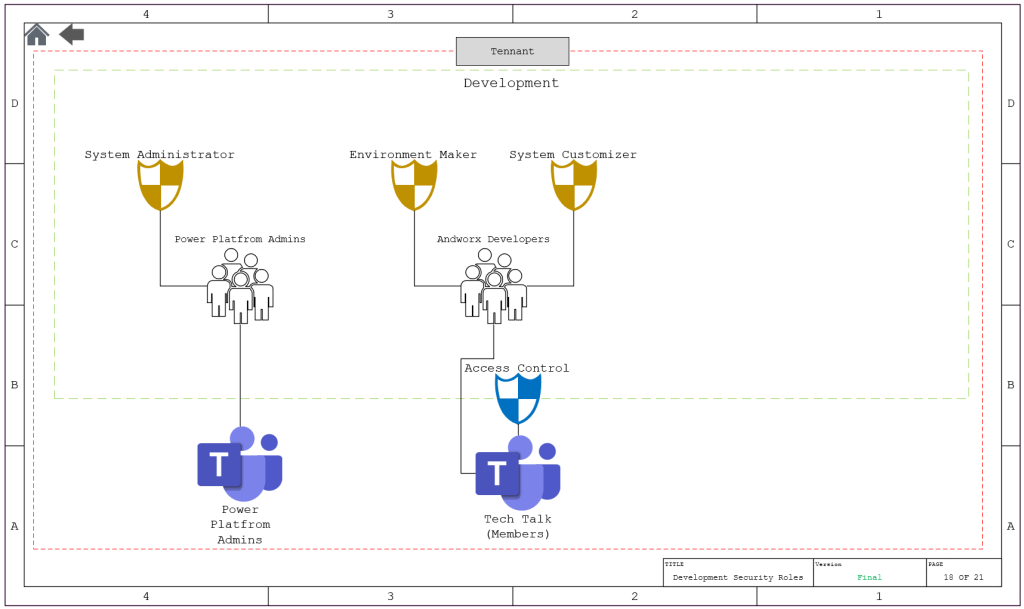
Configuration
- From the Power Platform Admin Center, Select Environments
- Select Development
- Select Teams from the Access Menu
- Select Create Team

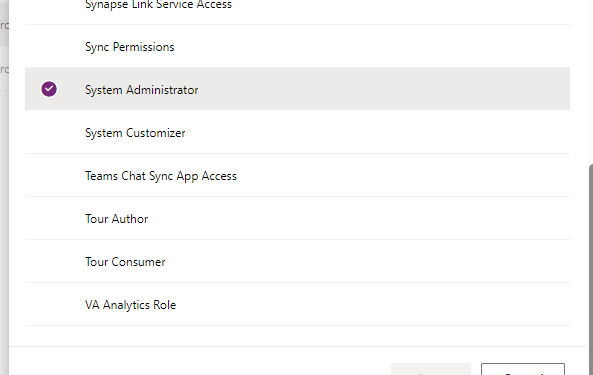
- Create the Admin Team
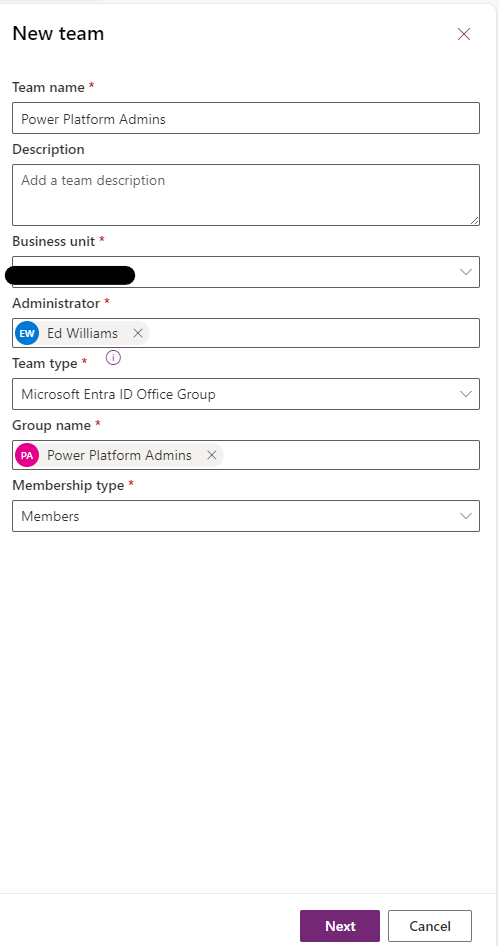
- Give it the System Administrator role
- Select Create team again
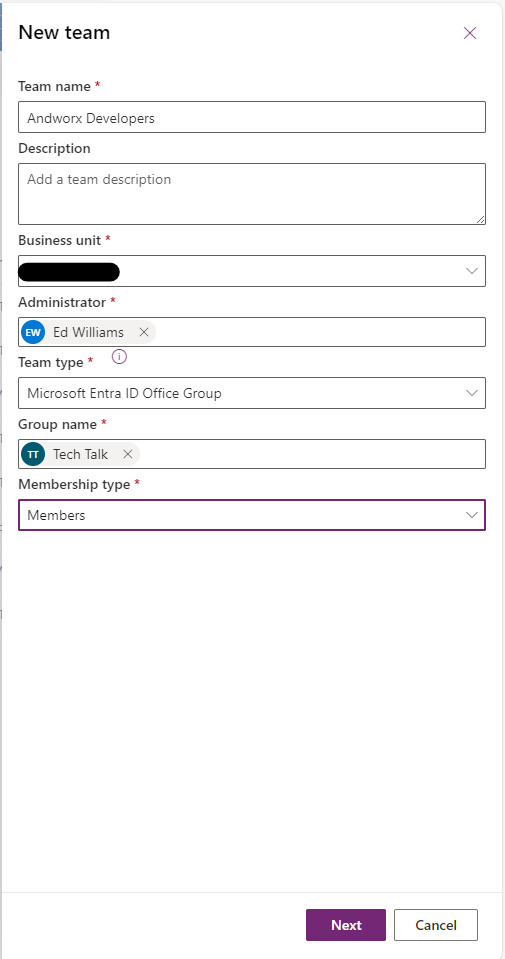
- Create the team to align it to the developers team and give it the Environment Maker Role and the System Customizer Role.
- If you have any custom security roles, add them at this time.
- Select Save.
Test
Design
Configuration
- From the Power Platform Admin Center, Select Environments
- Select Test
- Select Teams from the Access Menu
- Select Create Team
- Create the Admin Team
- Give it the System Administrator role
- Select Create team again
- Create the team to align it to the developers team and give it the Environment Maker Role and the Systems Customizer Role
- If you have any custom security roles, add them at this time.
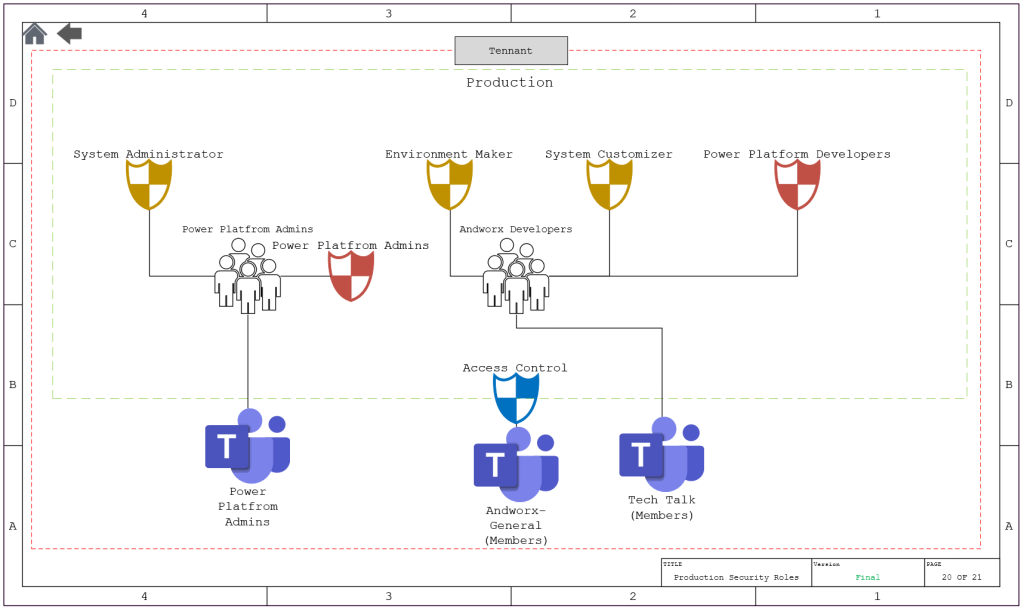
Production
Design
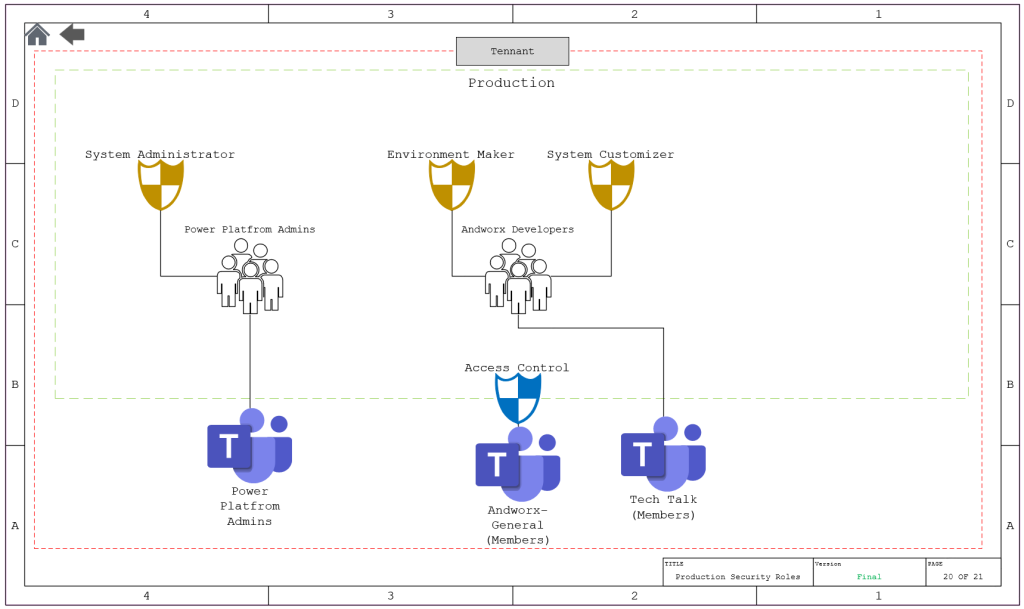
Configuration
- From the Power Platform Admin Center, Select Environments
- Select Test
- Select Teams from the Access Menu
- Select Create Team
- Create the Admin Team
- Give it the System Administrator role
- Select Create team again
- Create the team to align it to the developers team and give it the Environment Maker Role and the Systems Customizer Role
- If you have any custom security roles, add them at this time.
Orchestrator
Design
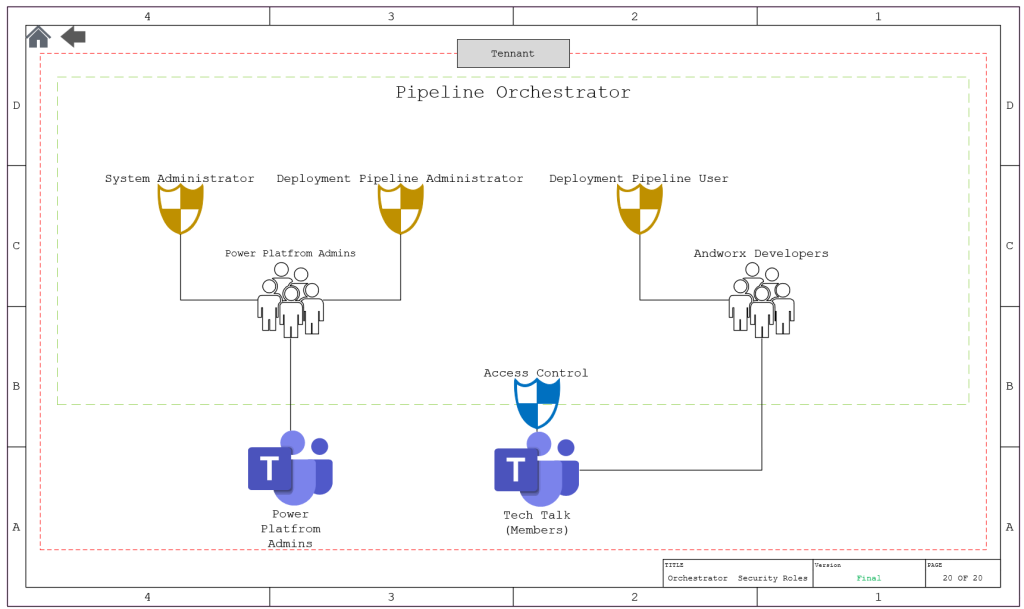
Configuration
- From the Power Platform Admin Center, Select Environments
- Select Orchestrator
- Select Teams from the Access Menu
- Select Create Team
- Create the Admin Team
- Give it the System Administrator role and the Deployment Pipeline Admin Role
- Select Create team again
- Create the team to align it to the developers team and give it the Deployment Pipeline User Role
- If you have any custom security roles, add them at this time.
Sharing Pipeline
With all the security roles assigned we now need to ensure that the pipeline has been shared with our developers.
Navigate to the Deployment Pipeline Configuration MDA.
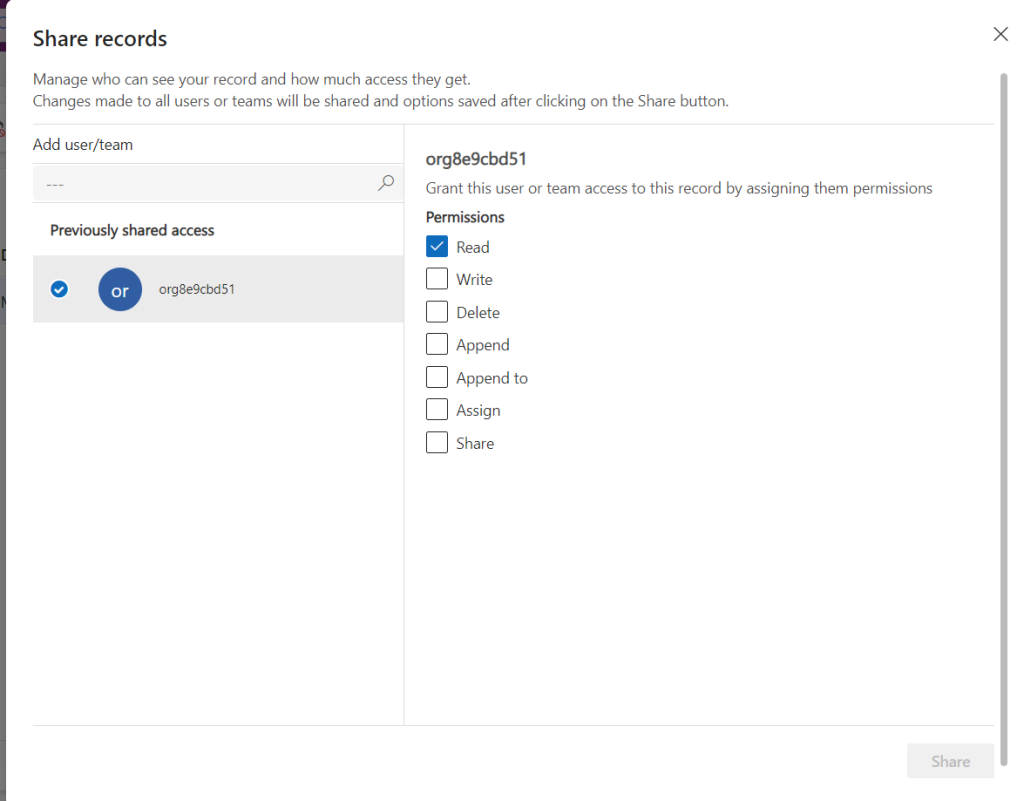
Select the Pipeline then select Share
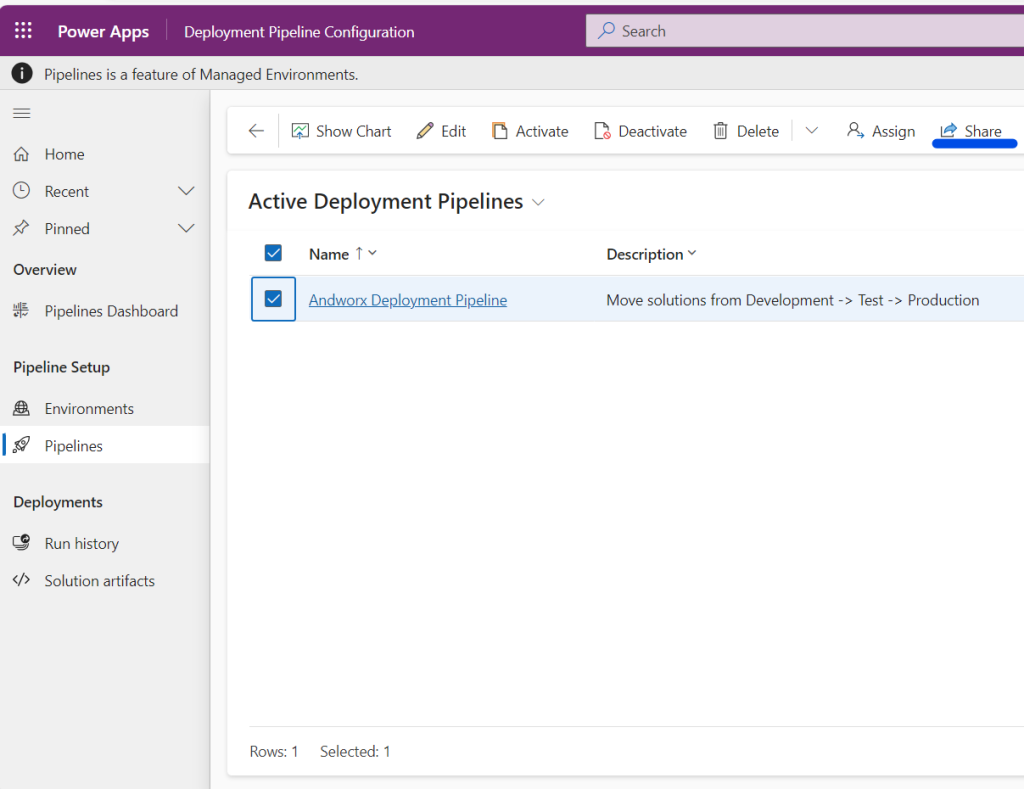
I have shared my pipeline with all members of the environment and granted them only read access. I did this because all members of the environment are part of the development team, and therefore no additional security is required.
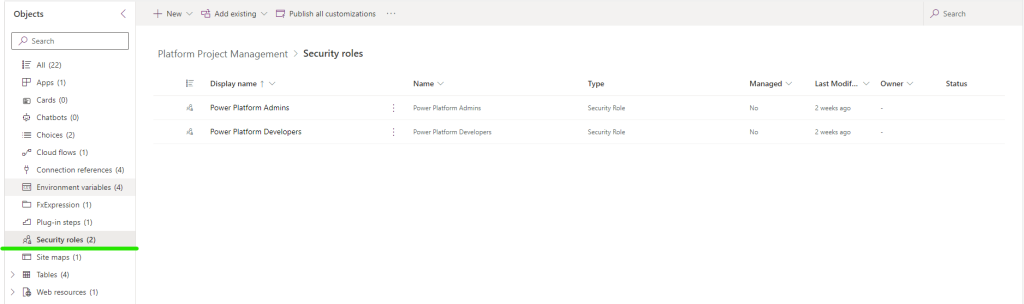
Security role to add the data to the PM app
The last thing to do is to create two security roles within the development environment to provide CRUD to the project management application.
- From the Power Platform Admin Center Navigate to the Development Environment
- Select Security Roles
- Select the Basic User Role then Copy
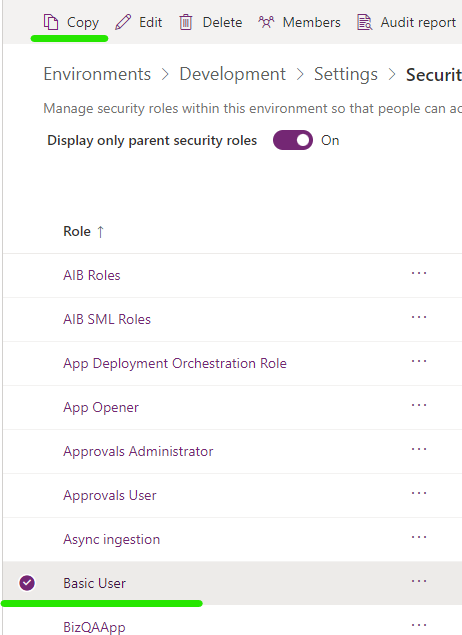
- Name the Copied Security Role Power Platform Admins
- Copy the Basic User Role Again and Name it Power Platform Developers
- Navigate to the Power Platform Admins Security Role
- Select Show only unassigned tables then navigate the to Custom Tables drop down
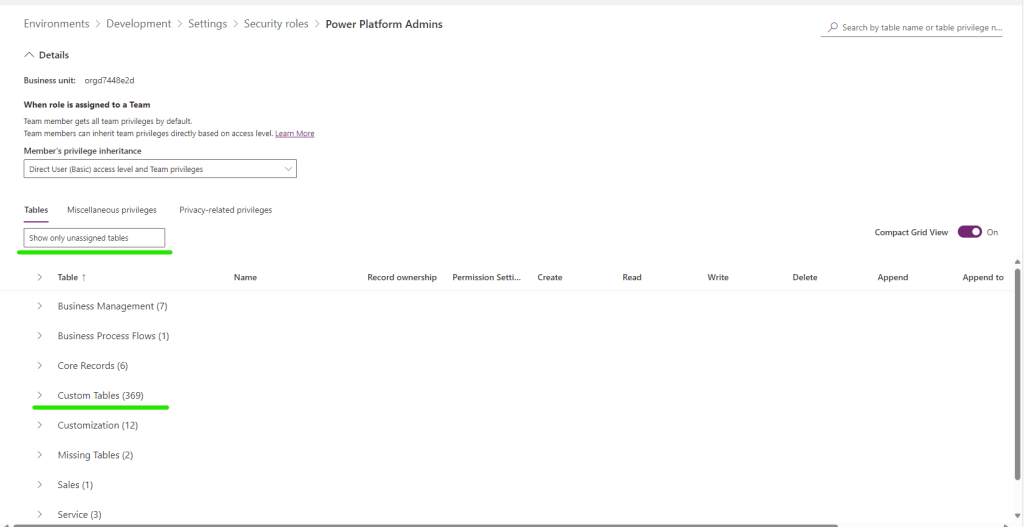
- Find the Power Platform Projects and the Power Platform Project Approvers tables and give the admins full CRUD rights to them

- Select save then open up the Power Platform Developers Security role
- Select Show only unassigned tables then navigate the to Custom Tables drop down
- Find the Power Platform Projects and the Power Platform Project Approvers tables
- Give read only to the Approvers table
- Give Contributor to the Projects table

- Save the role then navigate back to the solution in Development
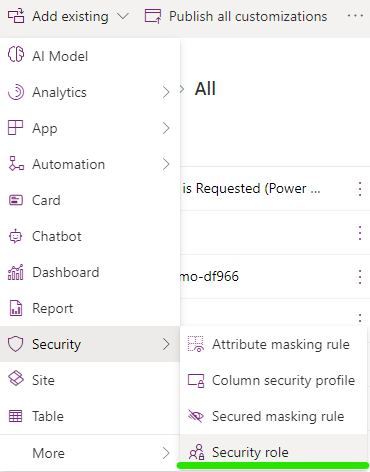
- Select Add Existing Security Role, then add both roles to the solution
- Now as the solution is pushed through the pipeline you have the ability to add the security roles to whatever group needs it. Using Production as an example we have aligned the roles to the Admin and the developers teams.