
Approvers
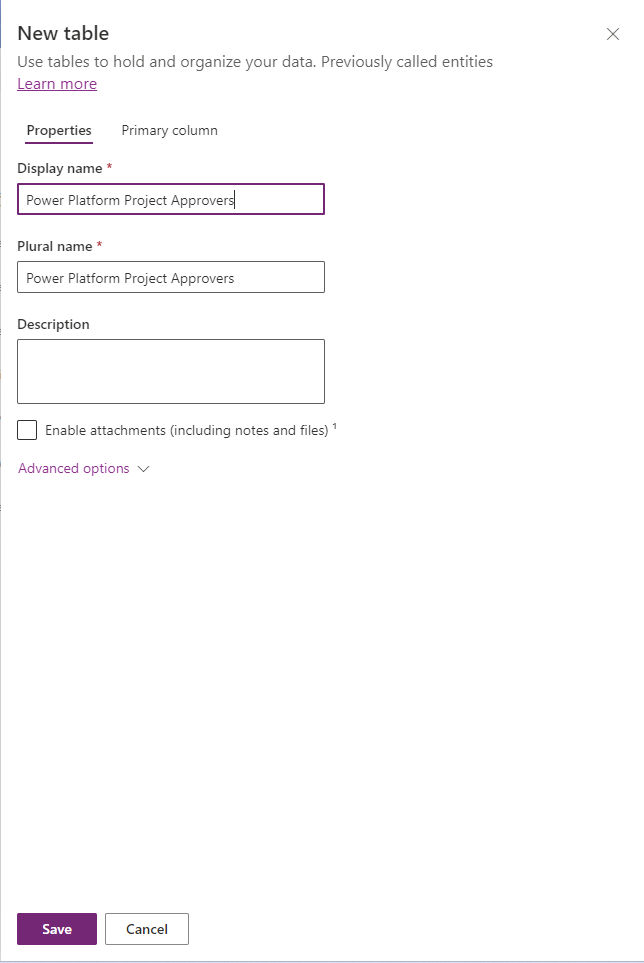
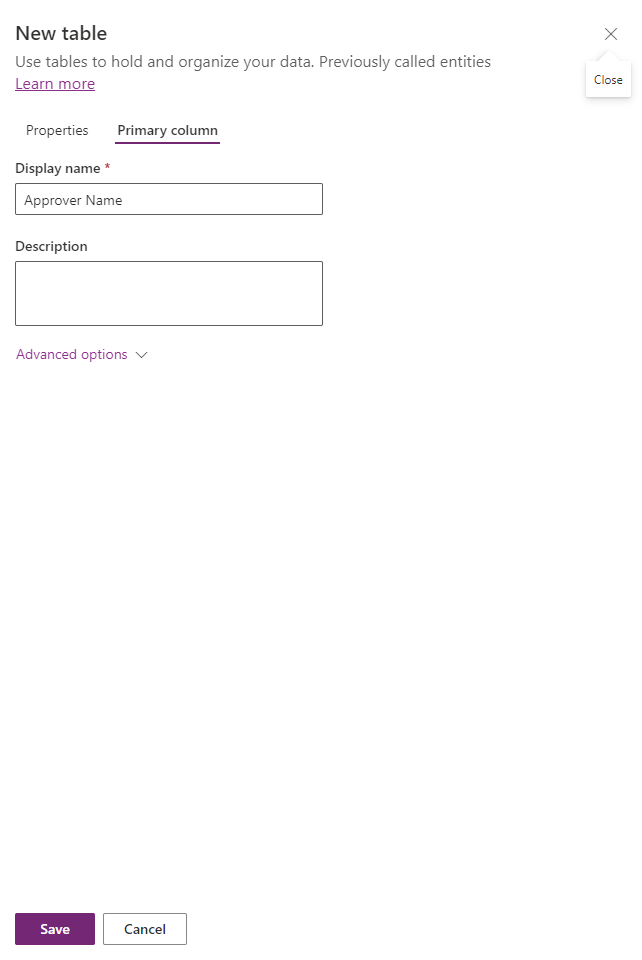
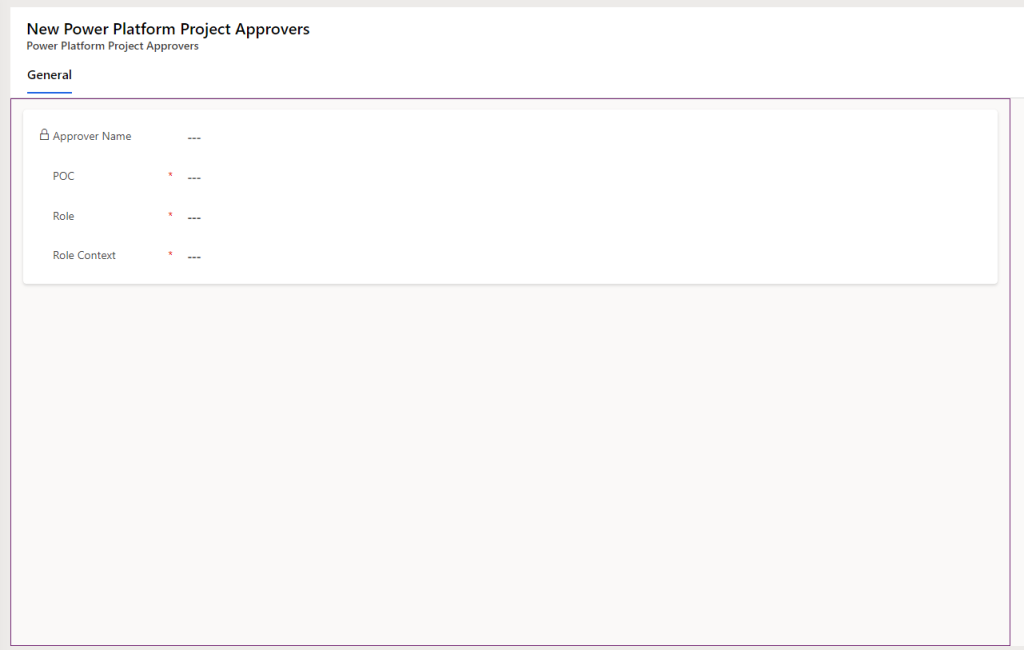
With the core of the app created we now need to define how approvals will be done. To do this we will create a new table called Power Platform Project Approvers. Use the following Diagram to construct the table
- Create the table with its Primary Column as Approver Name set the Required to Optional
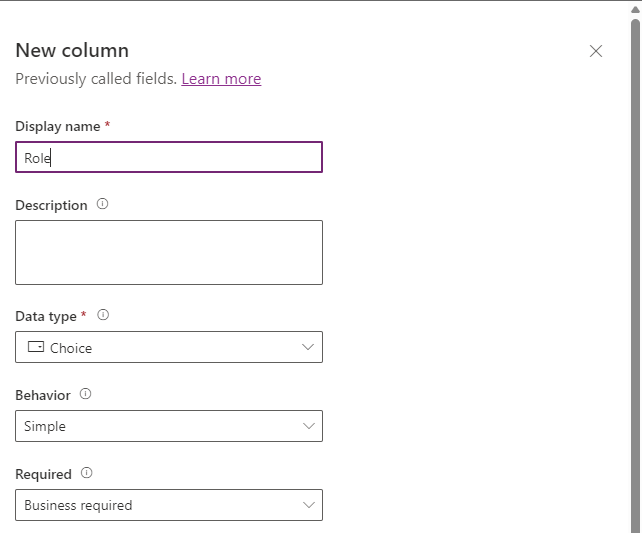
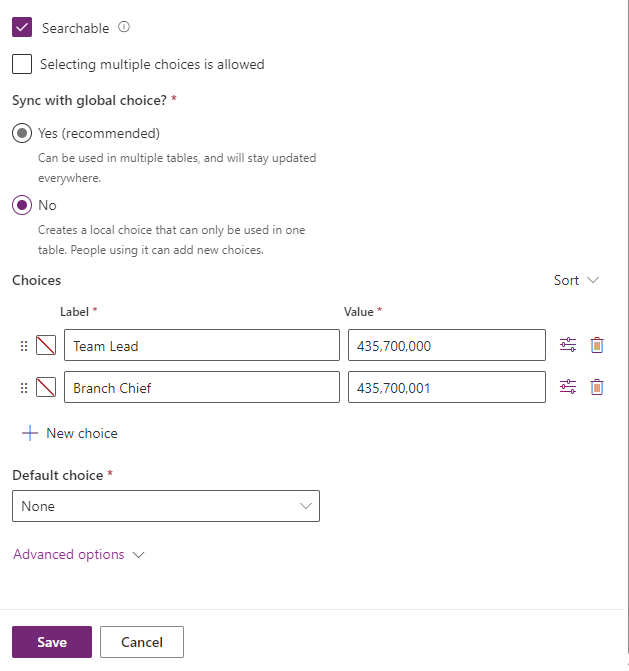
- Add a new choice column called Role, with a local choices
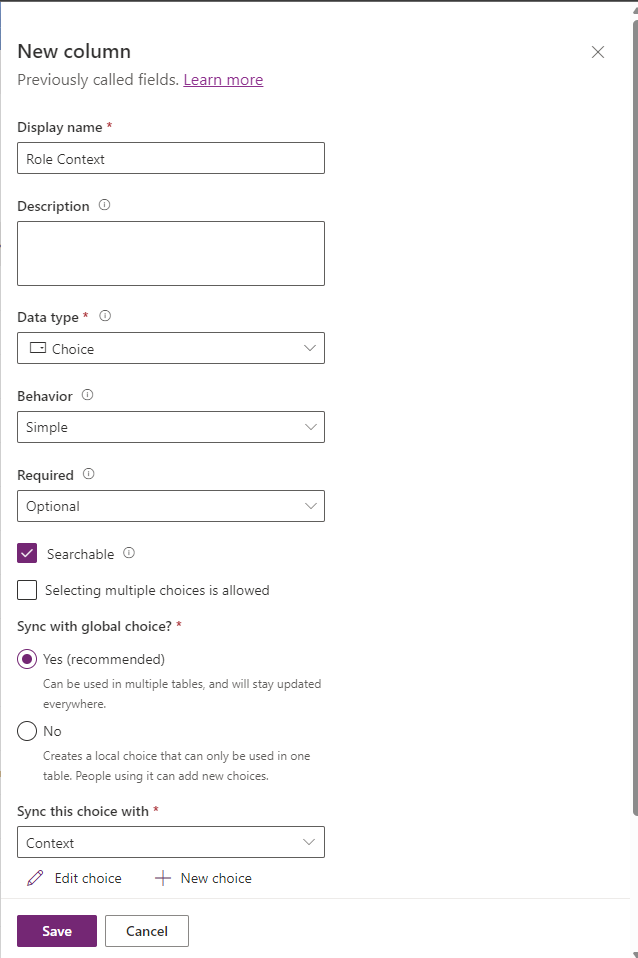
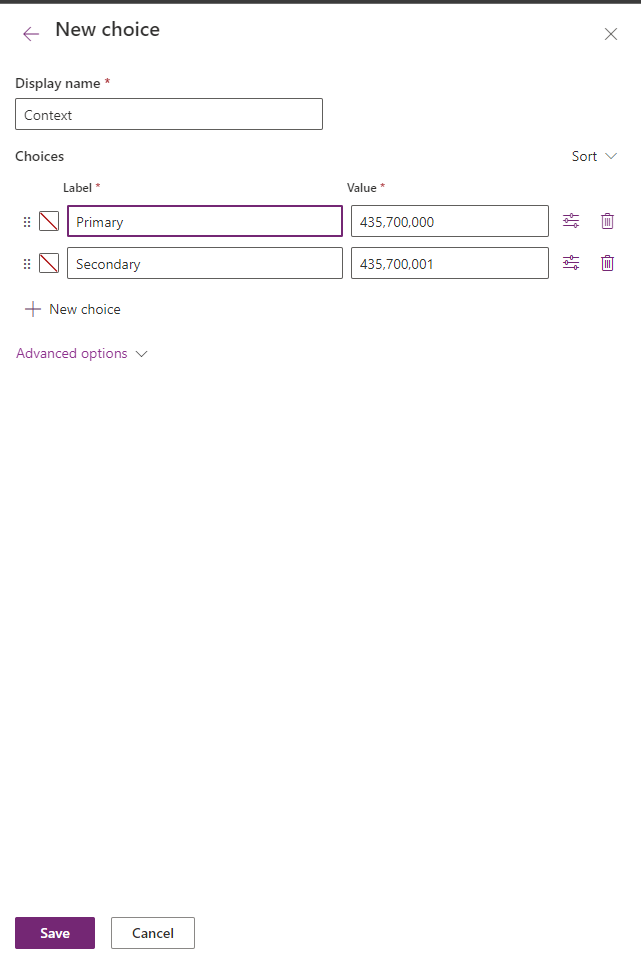
- Add another choice column called Role Context with a global choice called Context
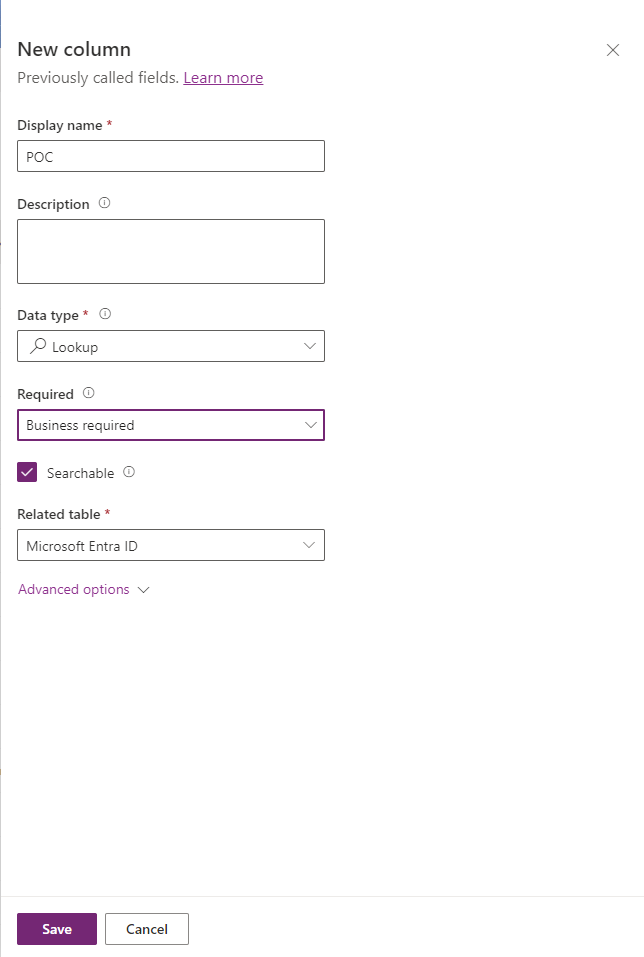
- Add one more lookup column to the Entra ID table called POC
- Update the Main form as follows
- Update the main view as follows
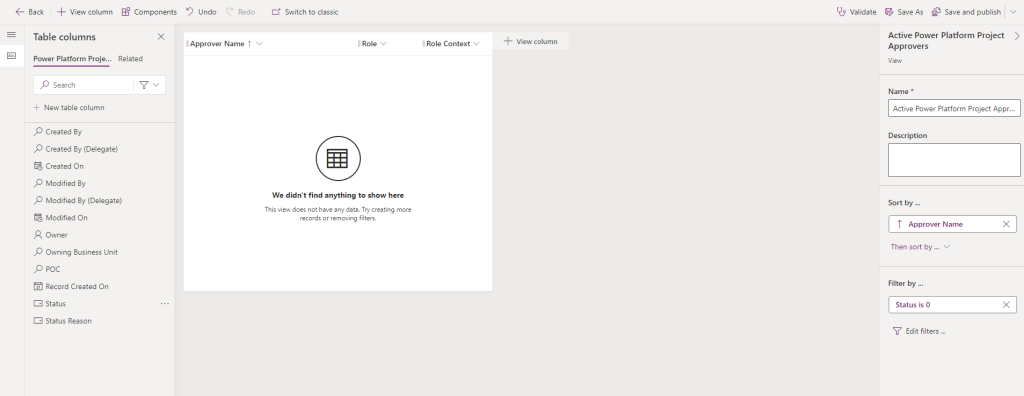
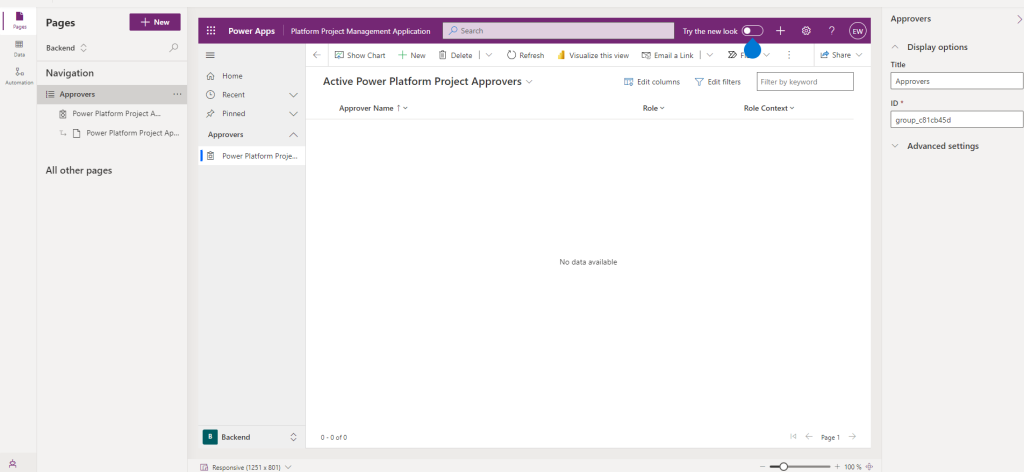
- In the MDA add a new area called backend and add the table
- To set the Approvers Name, we could use a Power Automate flow, JavaScript, or a Plugin. For this scenario I am going to use the Dataverse Accelerator App (yes I know it is preview, but its great).
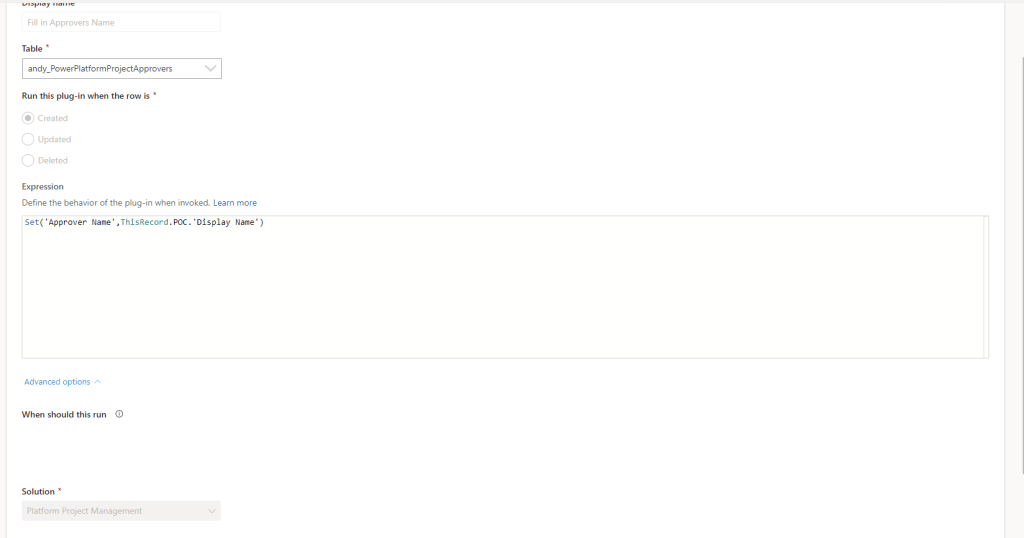
Set('Approver Name',ThisRecord.POC.'Display Name') - The Approvers Name will now be properly set upon creation
Approval Setup
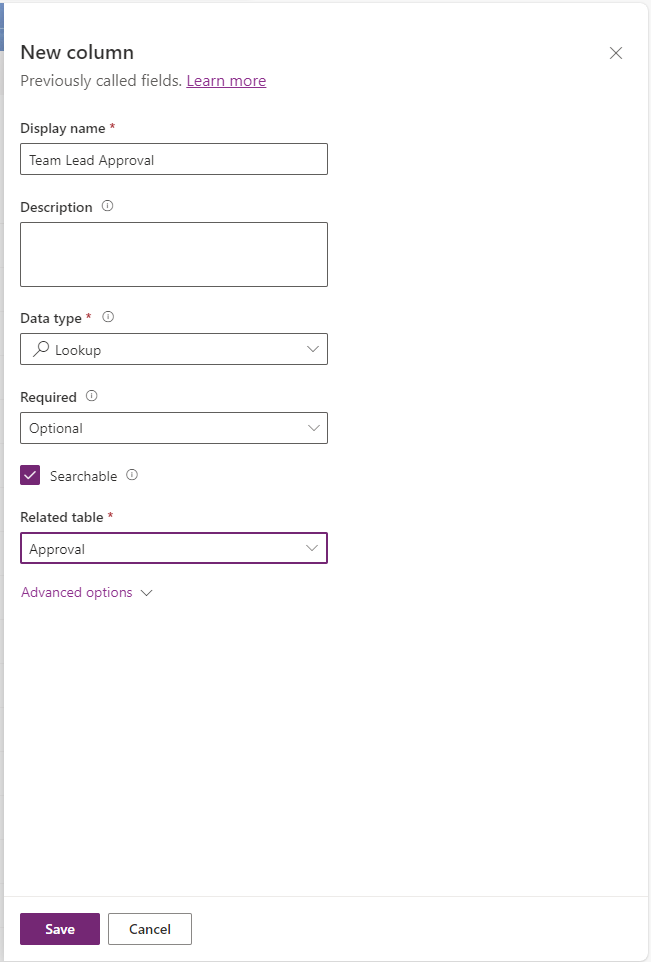
- Create two lookup columns in the Power Platform Projects table, each pointing to the Approvals Table. Call the first one Team Lead Approval and the second one Branch Chief Approval.
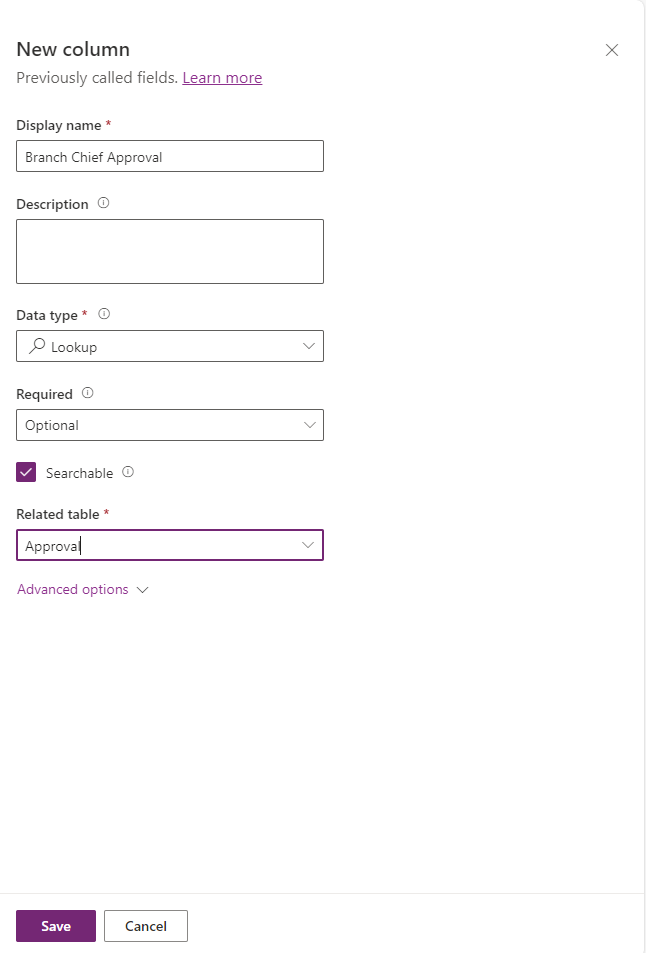
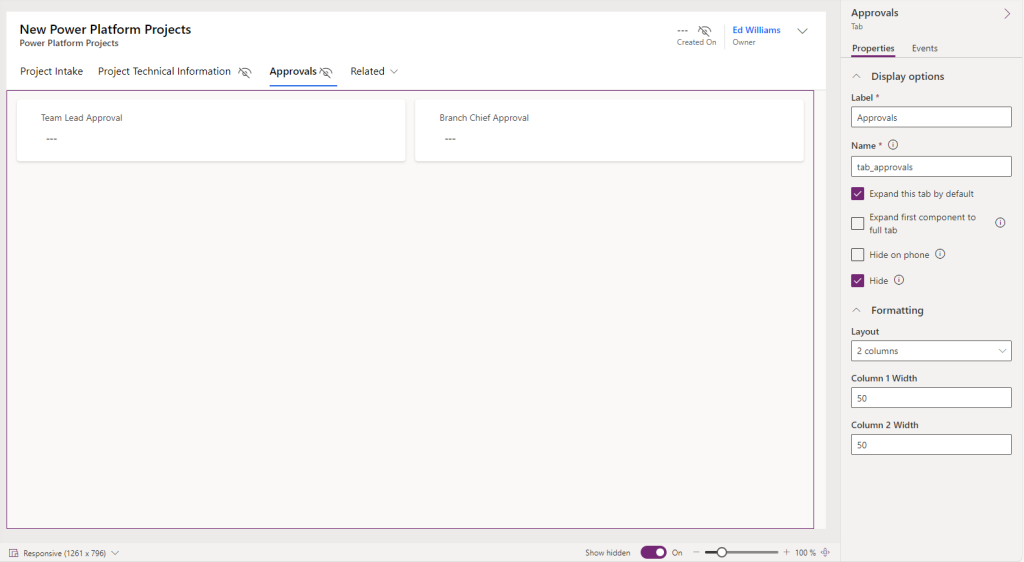
- Add the lookups to the main form in a new hidden tab call Approvals (we will do more with it later)
Project Approval Workflow
The last step will be to send an approval to the Team lead to start gathering basic requirements so estimation can occur.
💡 The estimation feature will be added at a later time
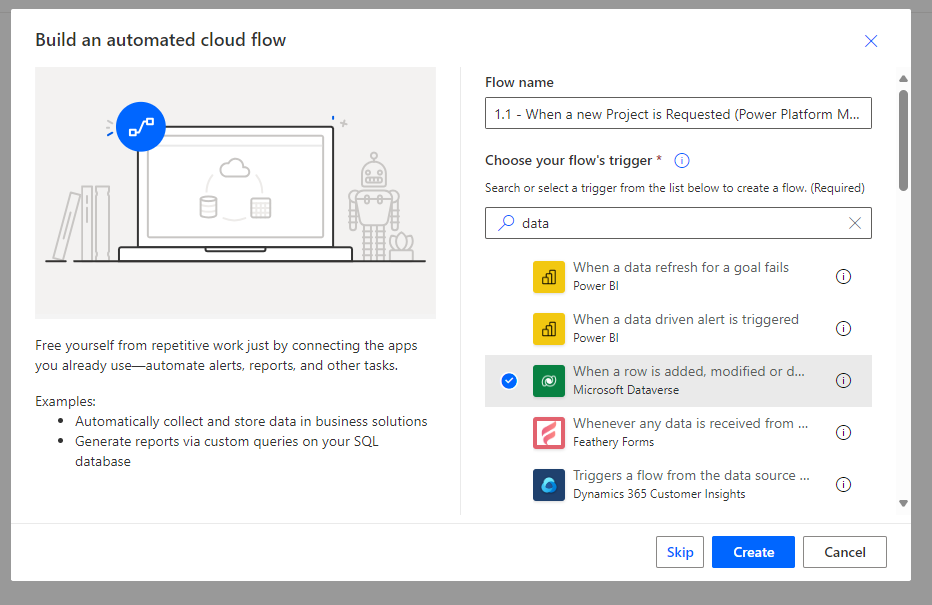
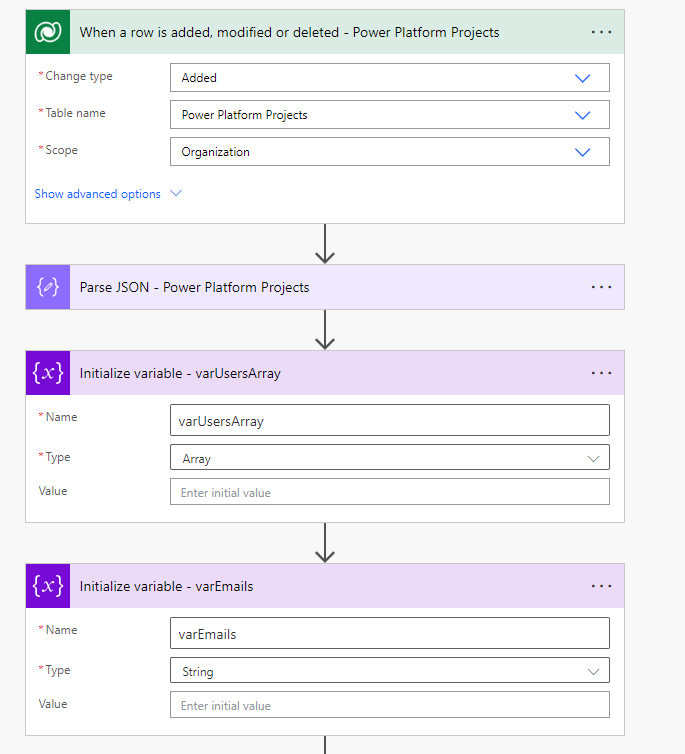
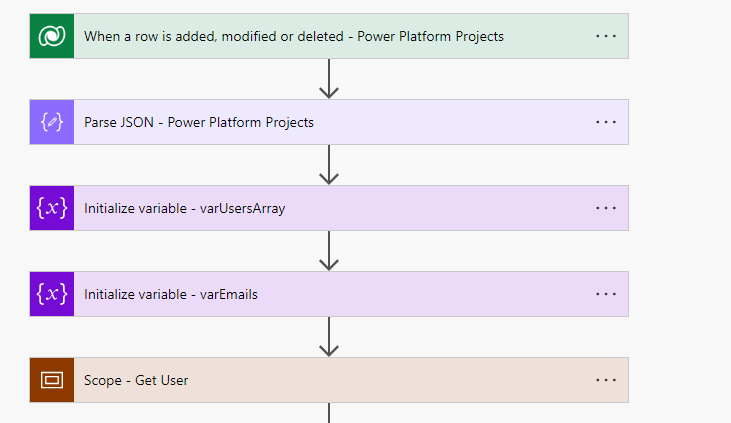
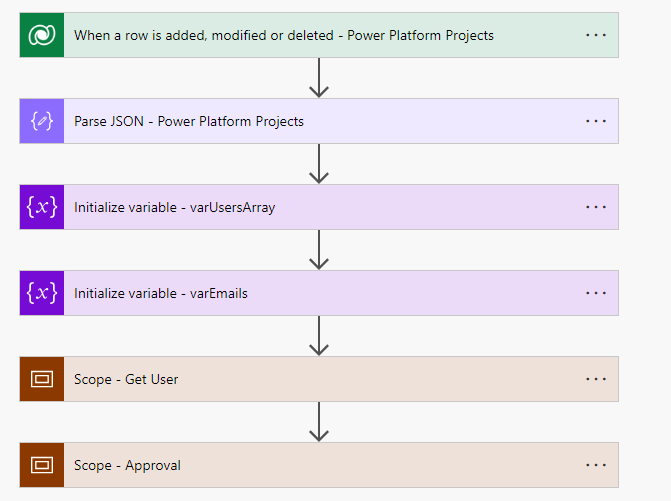
- Create a Power Automate flow called “1.1 - When a new Project is Requested (Power Platform Management)”, with a Dataverse trigger of “When a row is added, modified or deleted”.
- Add a Parse JSON Action that will read the output of the trigger
- Add an Array Variable called varUserArray
- Add a String Variable called varEmails
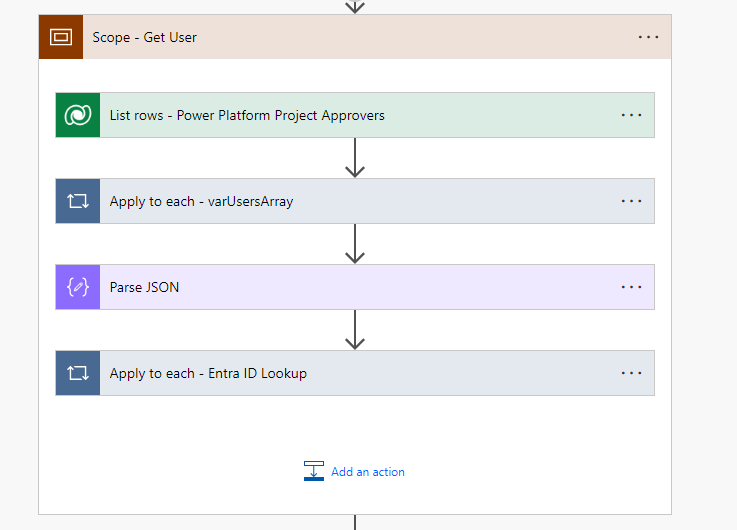
- Create a Scope Control called Get User
- Add a Dataverse List Rows action that filters off for the role Team Lead (435700000)

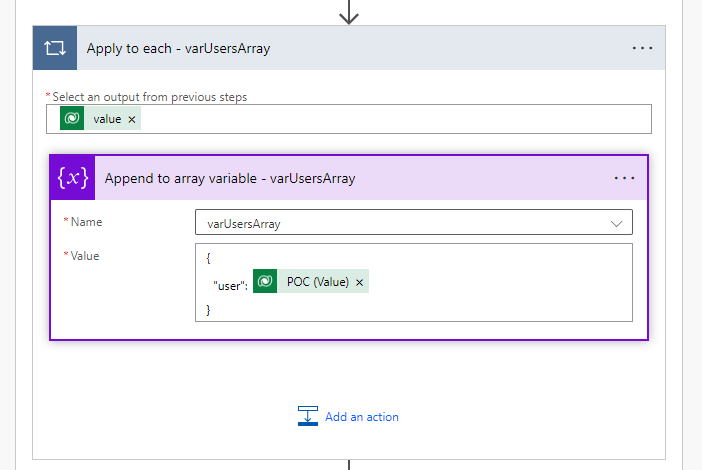
- Within an Apply to Each appended to the varUsersArray the POC information
- Parse the JSON of the varUserArray to make it dynamically accesible

- Within another Apply to Each lookup the Users info and append to the string variable varEmails the users Email

- Add another Scope Control called Approval
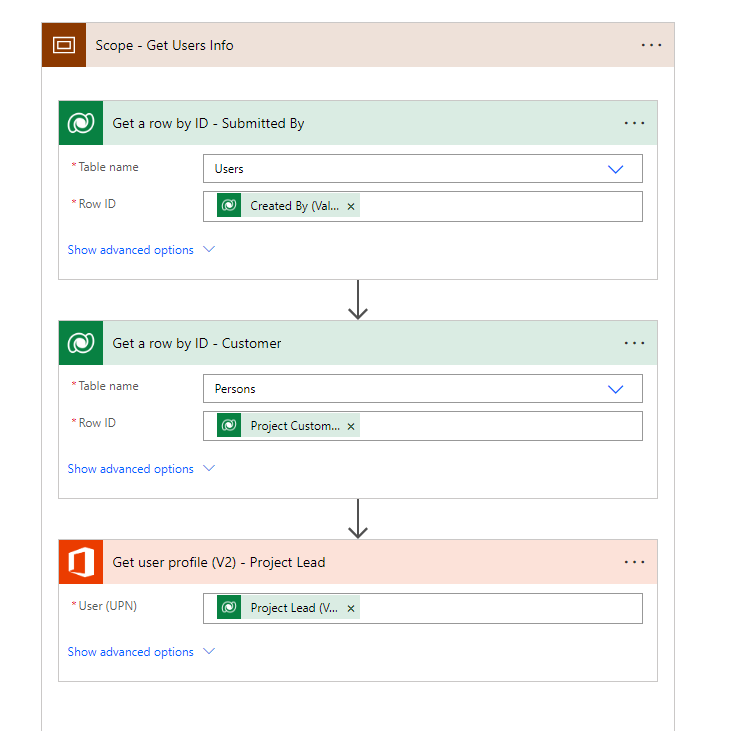
- Add a Scope Control inside and add three actions,
- Dataverse Get Row by ID for the Users table that uses the Created By as the ID
- Dataverse Get Row by ID for the Persons (Contacts) table that uses the Project Customer as the ID
- O365 Get user profile that uses the Project Lead value as the UPN
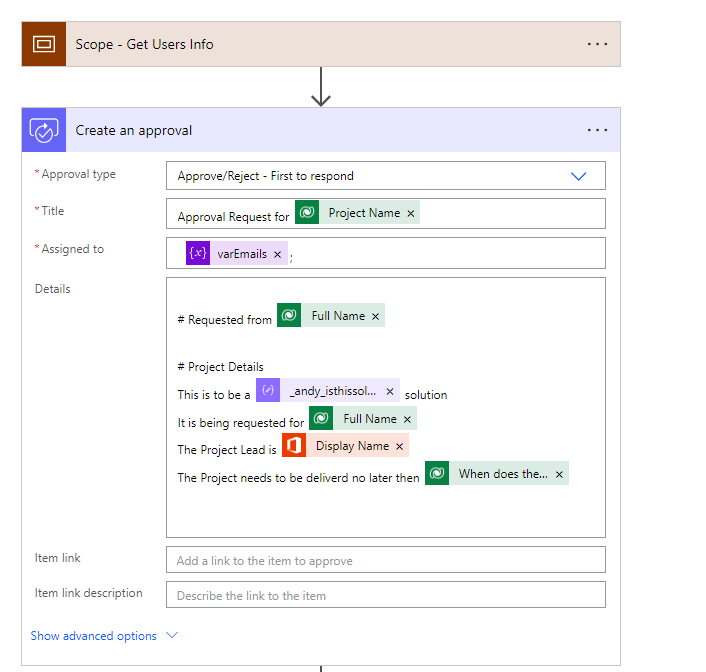
- Create an Approval action as follows
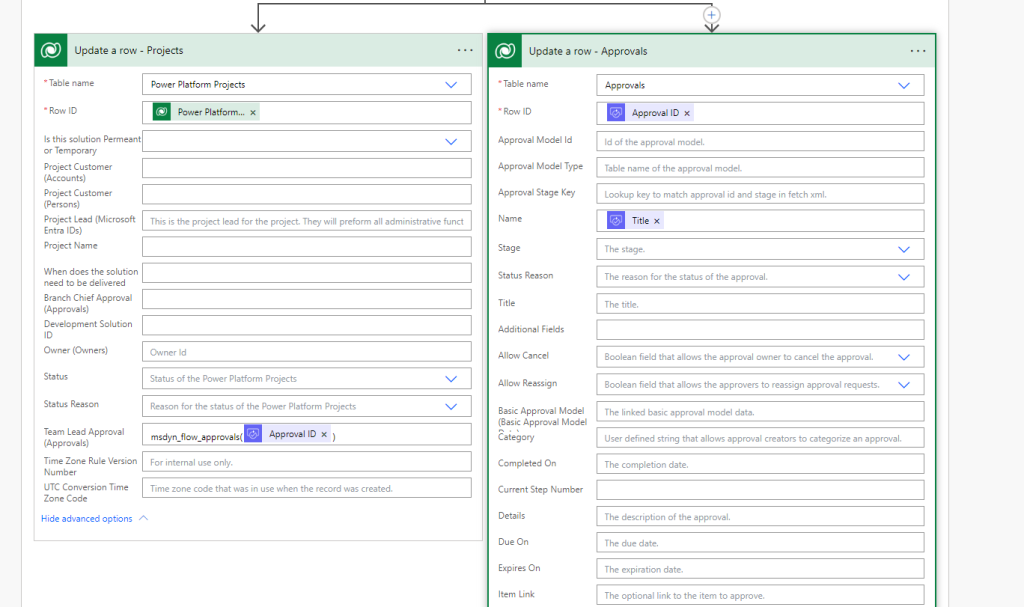
- Add two Dataverse Update a row actions
- Table-Power Platform Projects, ID Projects ID, Team Lead Approval will be the approval just created
- Table-Approvals, ID Approval created above, Name will be the title of the Approval (this is to make it “simple” to view)
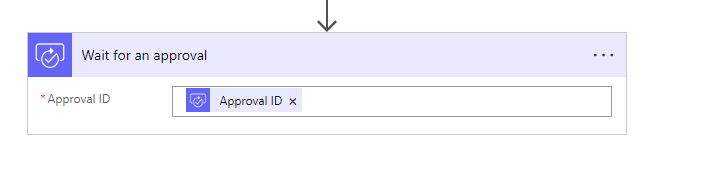
- Add a Wait for Approval Action using the ID of the approval from above
- Add a Condition based on the outcome of the approval
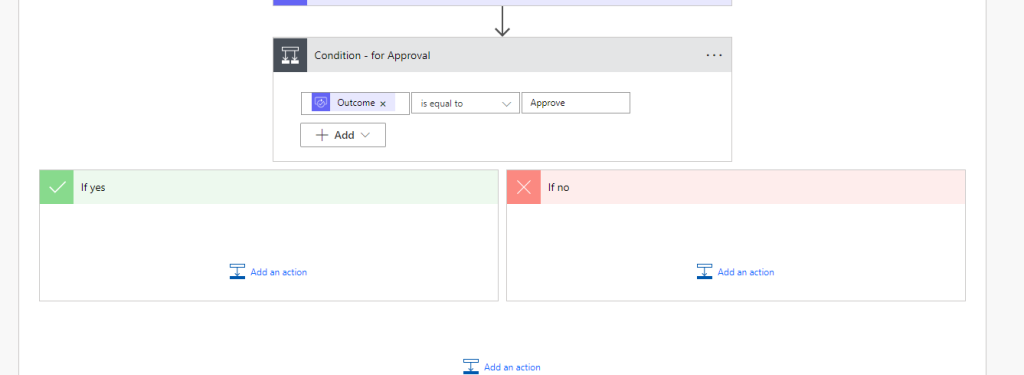
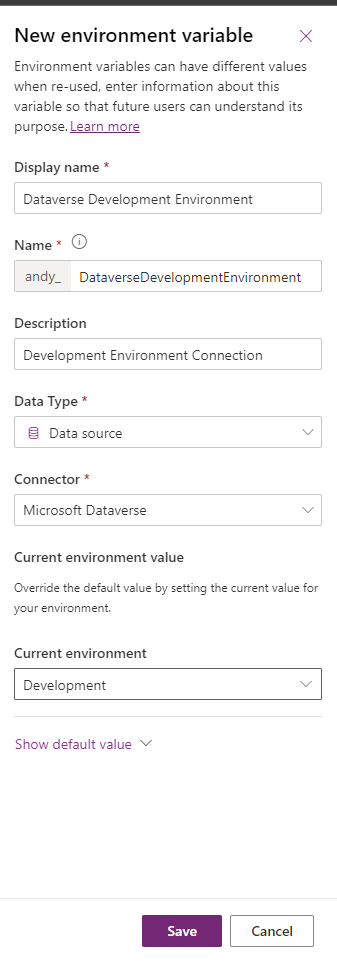
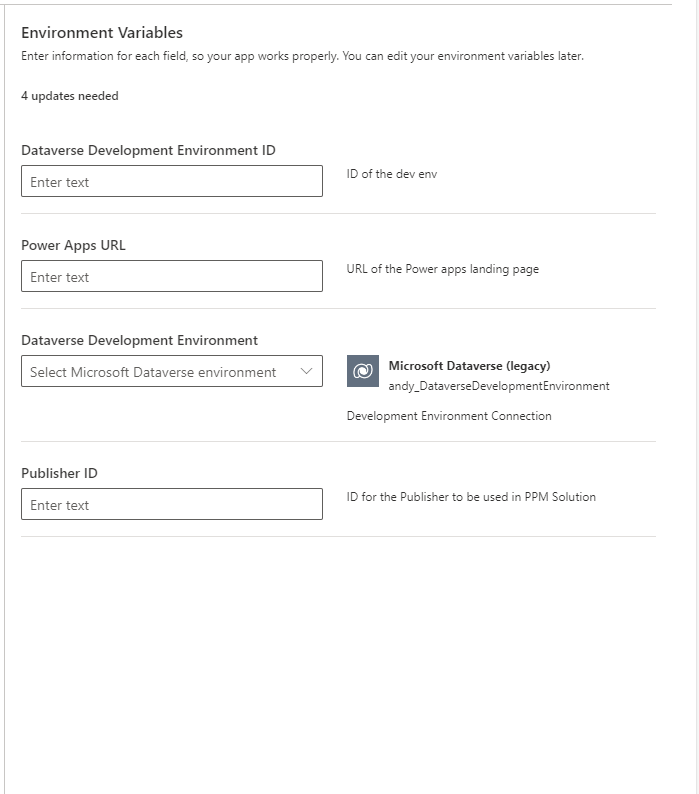
- If Approved we will need to add a row to the solutions table in the Development Environment. Because this needs to run from the Production Environment and this needs to leave my tenant I will add an Environment variable called Dataverse Development Environment
💡 Before Publishing this we will be removing the current value. If this is not done, then we will have to manually fix it in Test and Production
- Next we will add an Environment variable called Publisher ID for the solution publisher (this is done to ensure we have the publisher we want)

- Then we will add a Environment Variable called Dataverse Development Environment ID

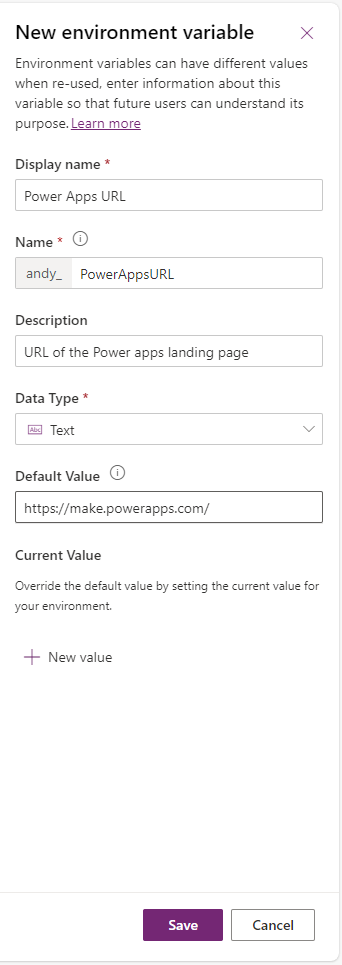
- The last Environment Variable will be for the Power apps URL. Depending on the cloud you are in this may differ, so it helps to have a variable set it for us
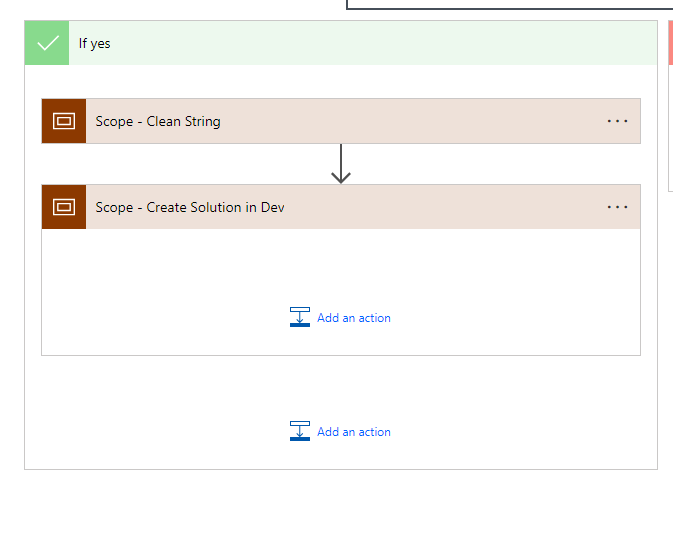
- Add a Scope Control that will help us clean the project Name String before being added. This is being done because the name must not contain any special characters or spaces.
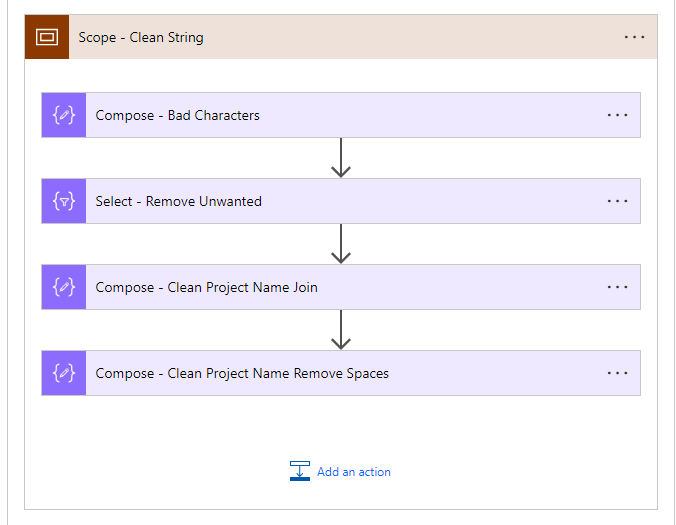
- Add a Compose called bad Characters
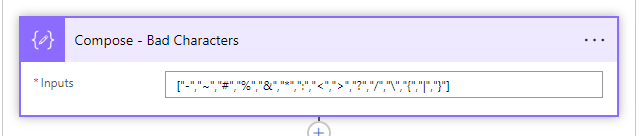
["-","~","#","%","&","*",":","<",">","?","/","","{","|","}"] - Add a Select and add the following Expressions

range(0, length(triggerOutputs()?['body/andy_projectname']))if (contains(outputs('Compose_-_Bad_Characters'), substring(triggerOutputs()?['body/andy_projectname'], item(), 1)), '', substring(triggerOutputs()?['body/andy_projectname'], item(), 1) ) - Add a Compose Action that joins the string back together.
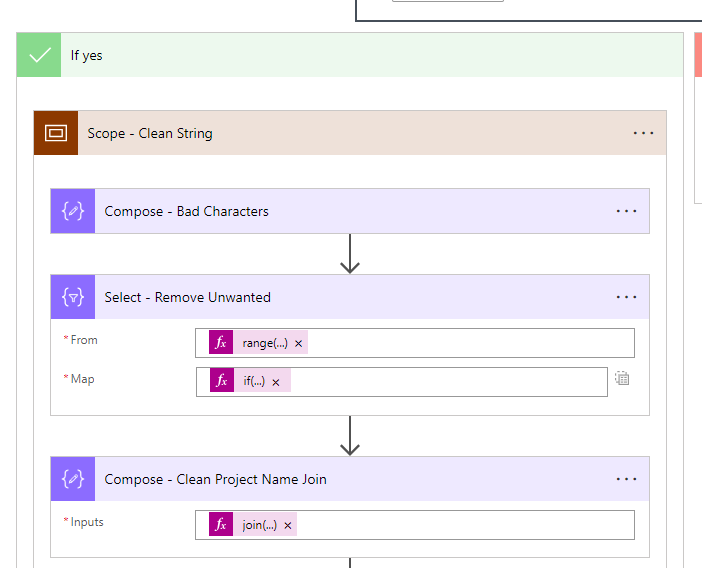
join(body('Select_-_Remove_Unwanted'), '') - Finally add a compose action that will remove any spaces from the string
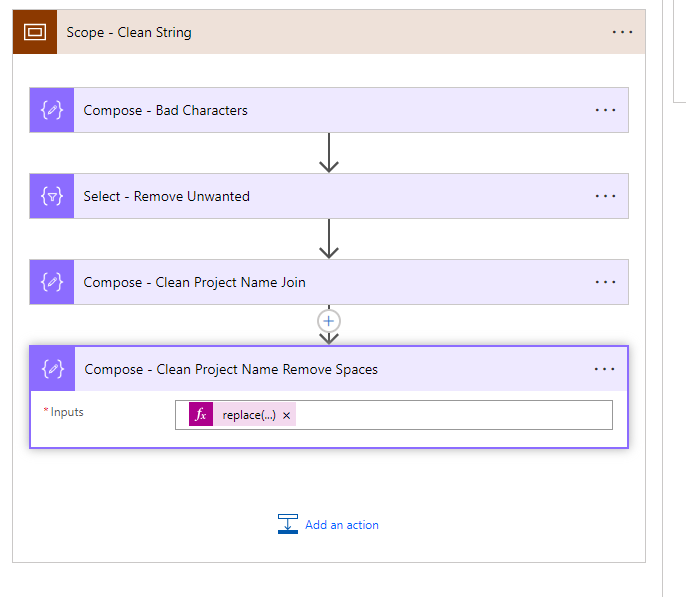
replace(outputs('Compose_-_Clean_Project_Name_Join'),' ','') - Add a Scope Control that called Scope - Create Solution in Dev
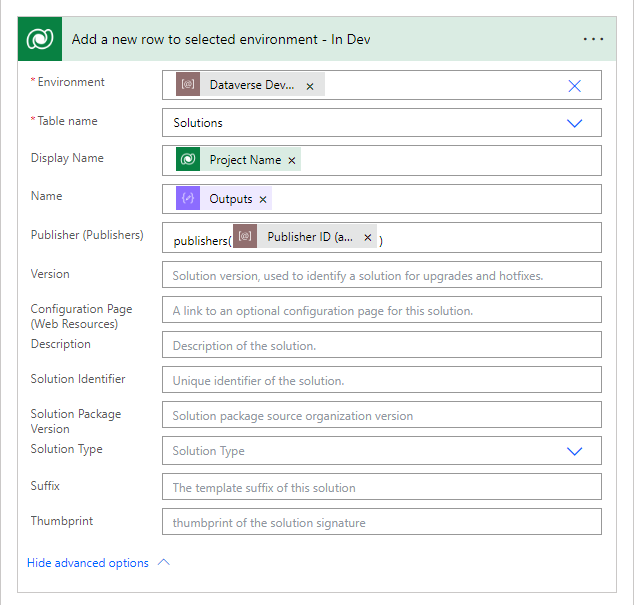
- Add a Dataverse Add a new row to selected environment Action
- The Environment will be the Environment variable “Dataverse Development Environment” set earlier
- The Table name will be Solutions
- The Name will be the output of “Compose - Clean Project Name Remove Spaces”
- The Publisher will be the Environment variable “Publisher ID”. Make sure to type the publisher as shown below.
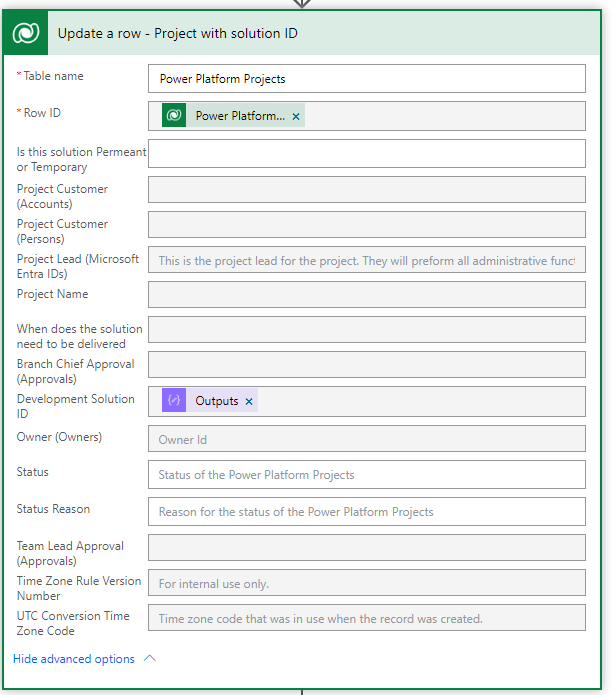
- One more Dataverse Update row will be added. This will update the table with the Name of the Solution.
💡 We are using the name vs a GUID because when it comes time to verify the solution in our pipeline all we have access to is the name
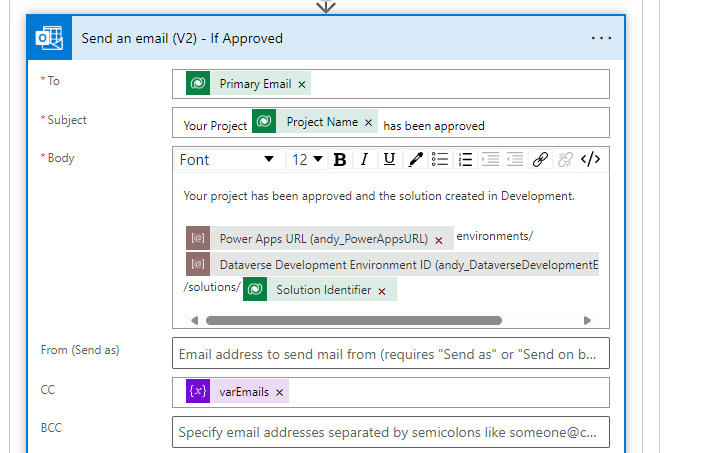
- The last action in this path will be to send an email if it has been approved.
- Add a Send an Email Action
- To will be to the Primary Email of the submitted
- The Subject will contain the Project Name
- The Body of the Email will have a note and a link to the solution. The Link will be constructed as follows
- Power apps URL environments/Dataverse Development Environment ID/solutions/Solution identifier
- CC will be the approvers
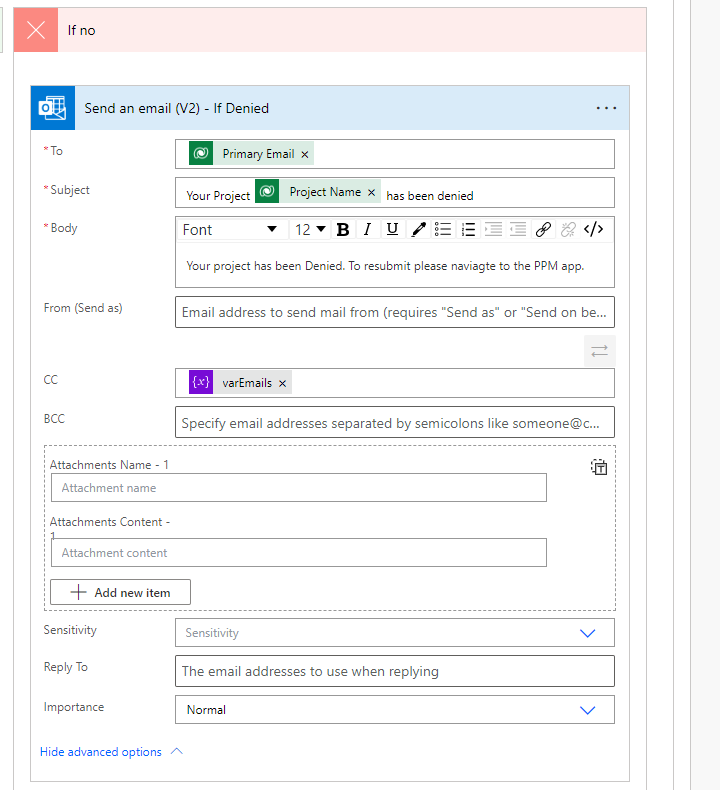
- If denied, we will send an email. Note, the link to the app is currently not loaded in, we will get that added when we push the solution to production.
Push to Test
- For each Environment Variable, remove the default value, then push the solution to test
- Update each variable to the appropriate value via the pipelines menu
- With the solution in Test create a request and verify that the solution is created in the Development Environment.
If you have any issues or questions feel free to send a message. If you simply want to download this solution you can find it all stored on my GitHub