The Why
This guide will explain how to create Forms and Views for all tables, as described in the following links: Forms and Views. This is necessary to build the backend MDA manager. Additionally, building out these forms, views and MDA allow us to ensure our data is structured correctly before building our canvas app.
The How
We will go through each table and build a view and a form. Each one of these will then be used in the MDA.
💡 I will be editing the main form for each of these tables. A new form could have been created, but for simplicity sake I went this path.
Project
- View
- Create a new view called All Projects
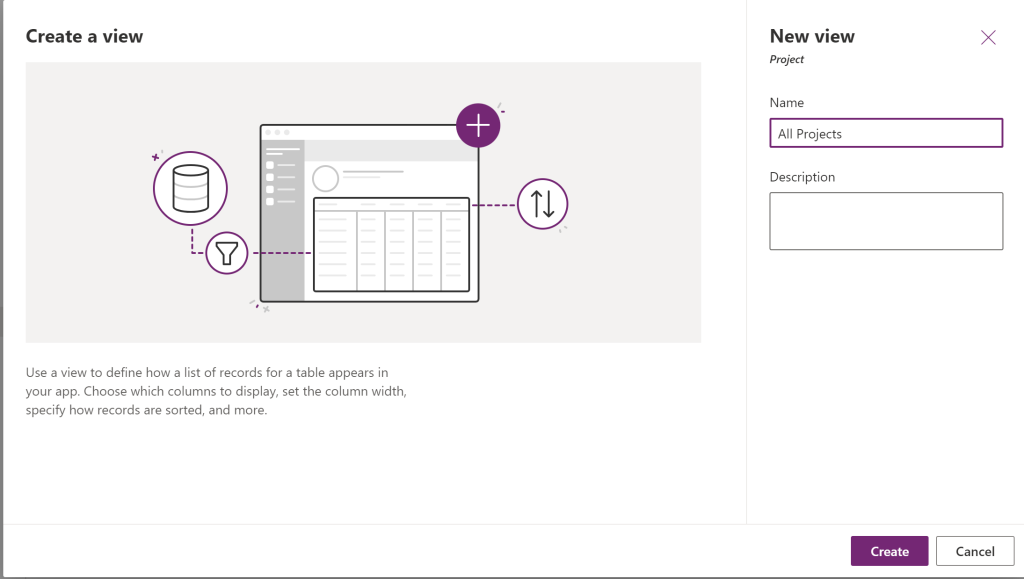
- Add the Project Name to the View. Then save and publish the form.

- Create a new view called All Projects
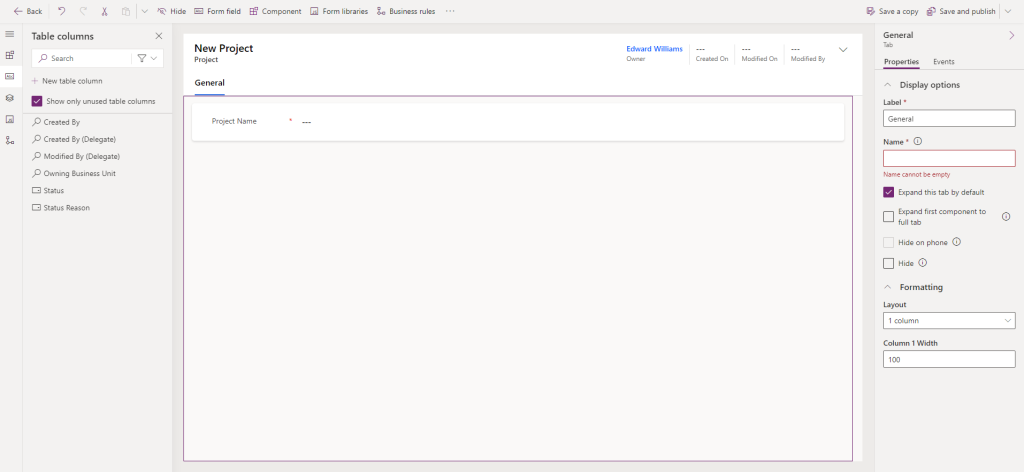
- Form
- Create a new Main Form called Project Main Form
- Configure the from as seen below
- Save and Publish the form
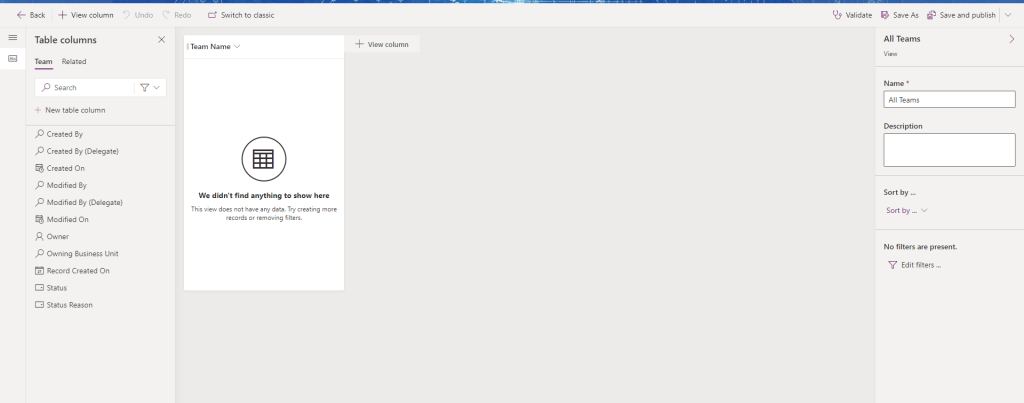
Team
- View
- Create a new view called All Teams
- Add the Team name to the view.
- Save and Publish the Form
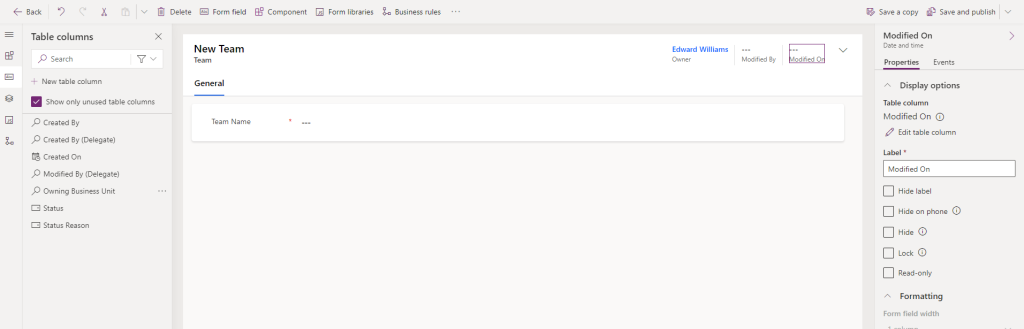
- Form
- Create a new Main Form called Team Main Form
- Configure the from as seen below
- Save and Publish the form
Hours
- View
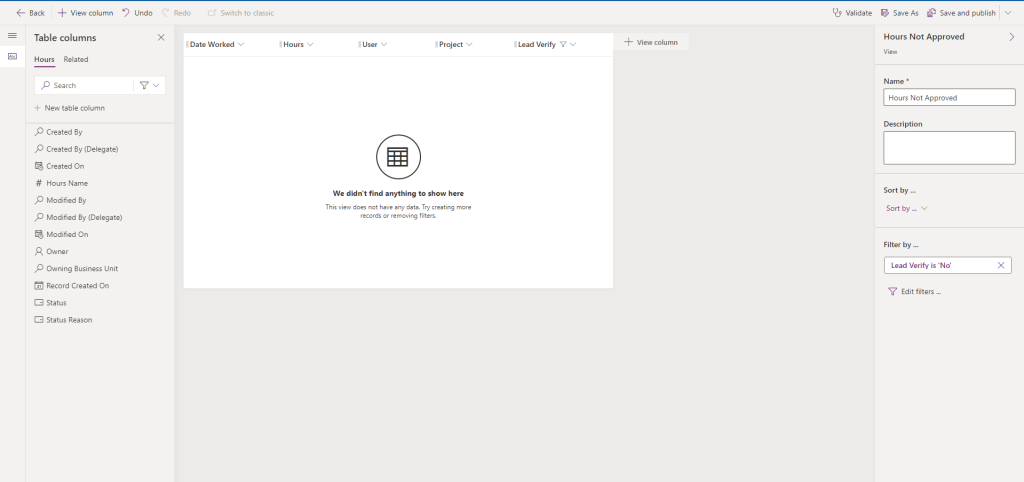
- Create a new view called Hours not Approved
- Add the Hours Worked, Hours, User, Project and Lead Verify to the View
- Add a filter to the View where Lead Verify equals No
- Save and Publish the view
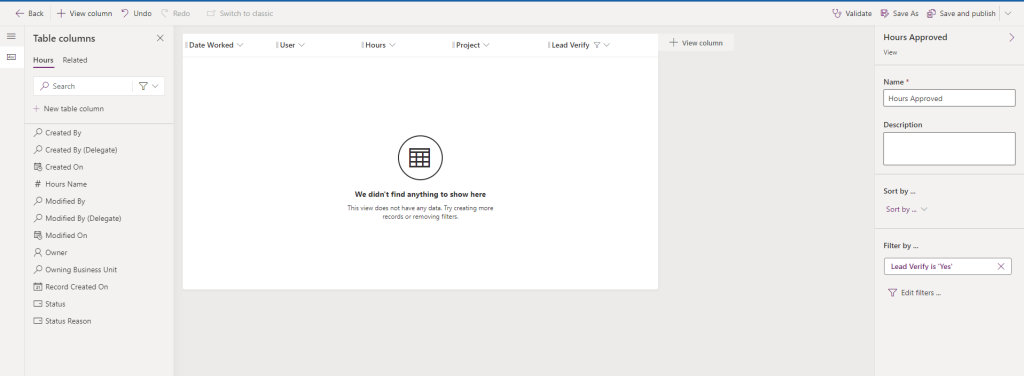
- Create a new views called Hours Approved
- Add the Hours Worked, Hours, User, Project and Lead Verify to the View
- Add a filter to the View where Lead Verify equals Yes
- Save and Publish the view
- Create a new view called Hours not Approved
- Form
- Create a new Main Form called Hours Input
- Configure the from as seen below
- Save and Publish the form

User
- View
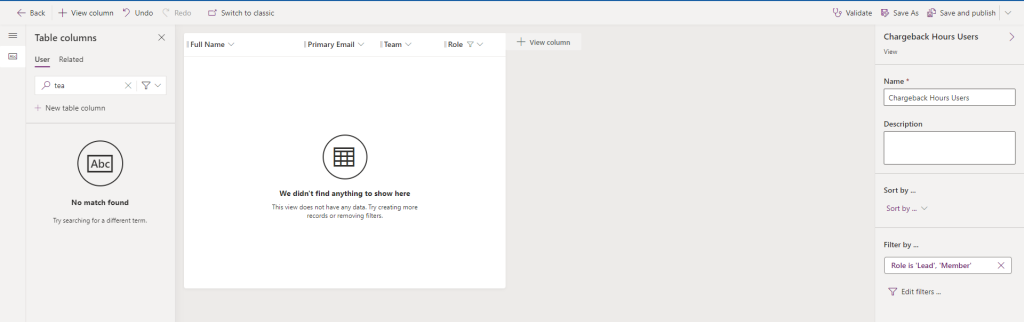
- Create a new views called Chargeback Hours Users
- Add the Full Name, Primary Email, Team, and Role to the View
- Filter the Role so that it equals both Lead and Member
- Save and Publish the View
- Form
- From the Forms view input the managed User form if it is not already there.

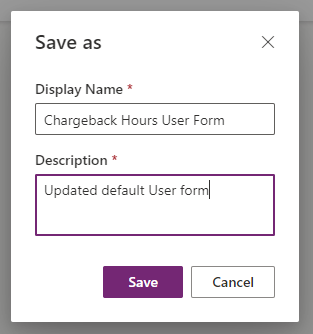
- Open the Form and select Save a copy

- Save the new form as the Chargeback Hours User Form
- Add a new 2 column tab called Hours
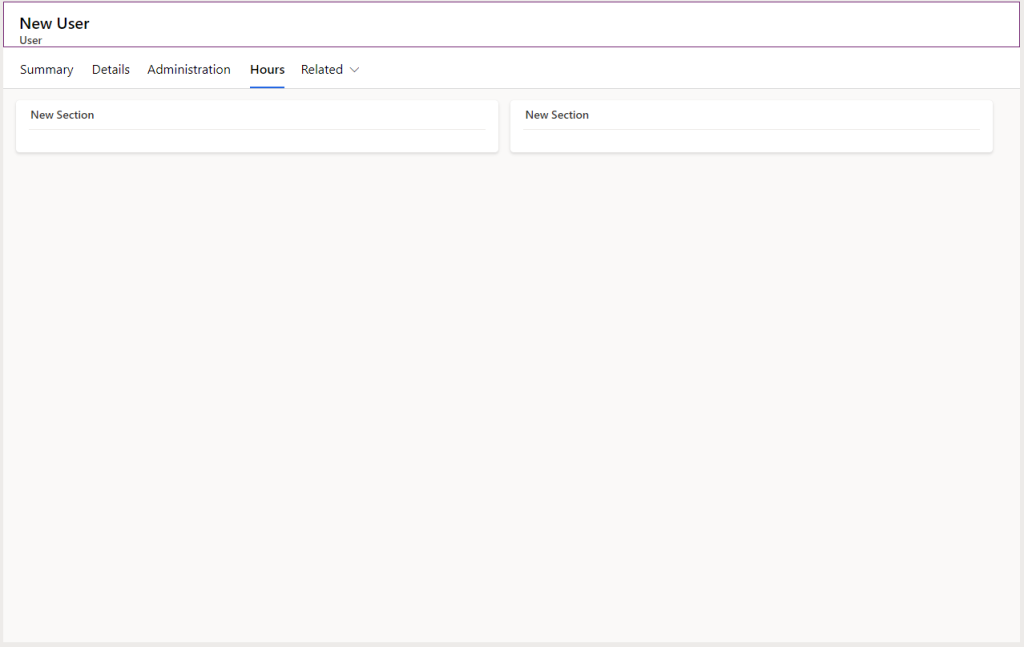
- Name the tab on the left Hours Tracker Team and the one on the right Projects
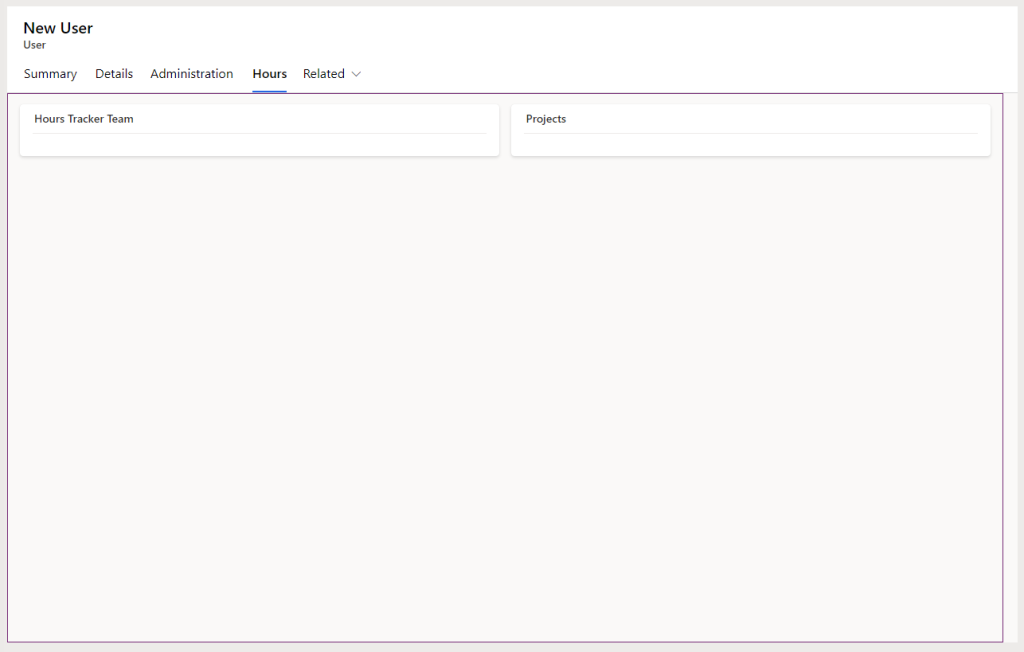
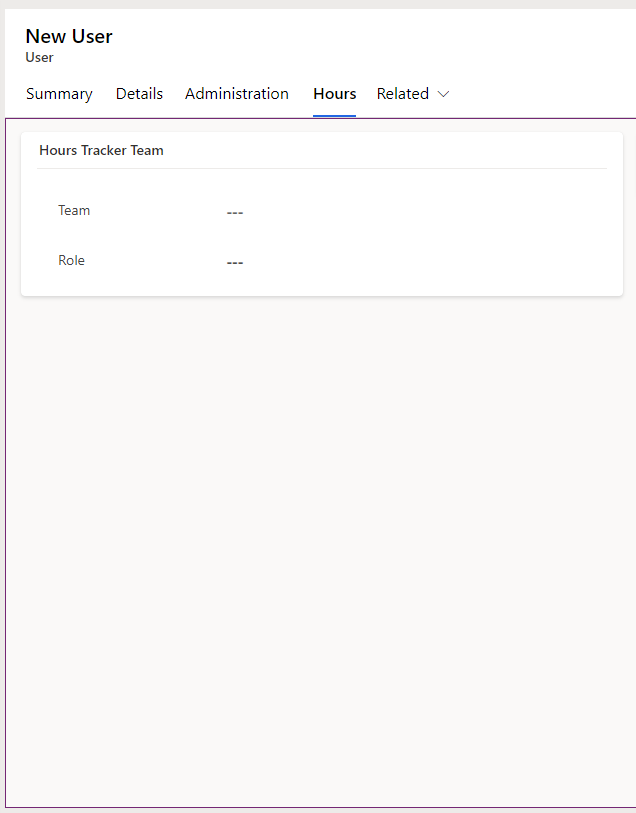
- Add the Team and the Role to the Hours Tracker Team tab
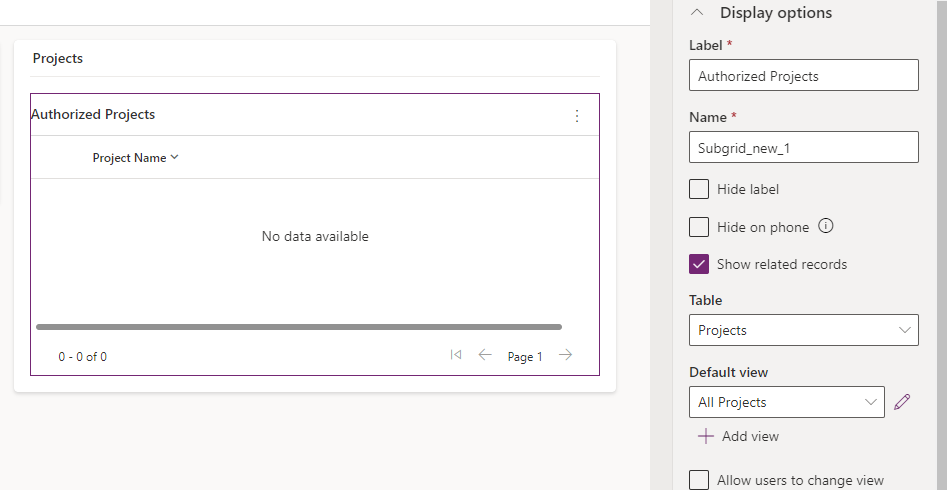
- In the Projects Tab add a Subgrid
- Select Show related records
- Select the Projects table
- Select the All Projects View
- Press Done
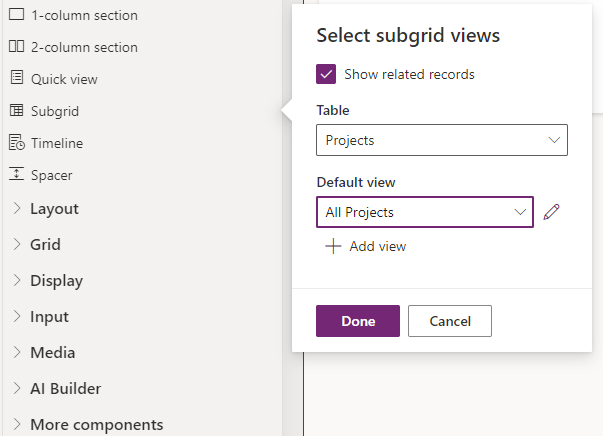
- Rename the subgrid to Authorized Projects
- Save and Publish the form
- From the Forms view input the managed User form if it is not already there.
In the next guide we will go over how to add all these forms and views to our Model Driven Application.