
2/8/2022
The Why
This article provides the second installment in the series on designing and constructing a Model Driven App (MDA). It is recommended that readers review the first part prior to proceeding, as it serves as a foundation for understanding the MDA development process.
In this section, we will be constructing the tables as outlined in the initial phase. Tables are classified into two principal categories: System Tables and Custom Tables. System Tables are provided by the platform and their content cannot be altered. Custom Tables, on the other hand, are generated by users, may be modified, and extended. Both types of tables offer their own set of properties and functions which may be employed in the development of the app.
Custom Tables can be built in the Power Platform using the Common Data Model (CDM). CDM is a Microsoft-defined data structure that allows users to create and manage custom tables with ease. To build custom tables, users must first define the data structure in the CDM by specifying the data types, fields, and relationships between the tables. Once the custom table structure is created, users can then use the Power Platform tools to design the user interface and create the underlying logic. To learn more about the CDM and how to build custom tables, refer to the Microsoft documentation
The How
Build Solution
Utilizing solutions in the Power Platform is a pivotal part of the app-building process, affording users the ability to store their app components in one, self-contained package. Solutions provide users with the convenience to export, import, and share app components, negating the need for manual configuration. Additionally, solutions offer version control for app components, guaranteeing that any modifications to the app are tracked and monitored. Finally, solutions can be utilized to deploy the app across multiple environments, allowing users to test the app in various scenarios. For further information on solutions in the Power Platform, please refer to the Microsoft documentation.
Steps
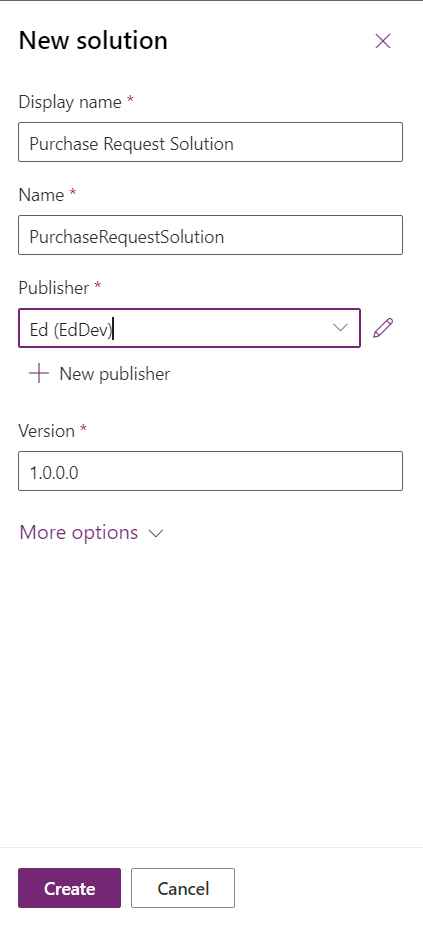
- Log into the Power Platform and select the Solutions tab.
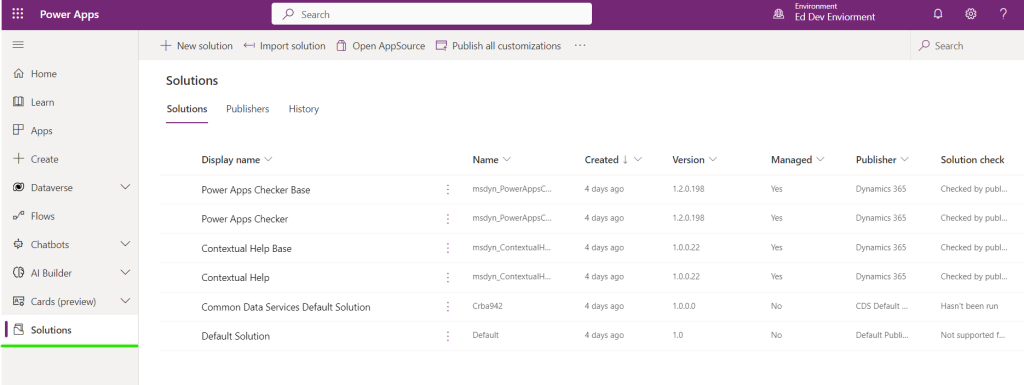
- Click New Solution.

- Enter a unique name for the solution and click Create.
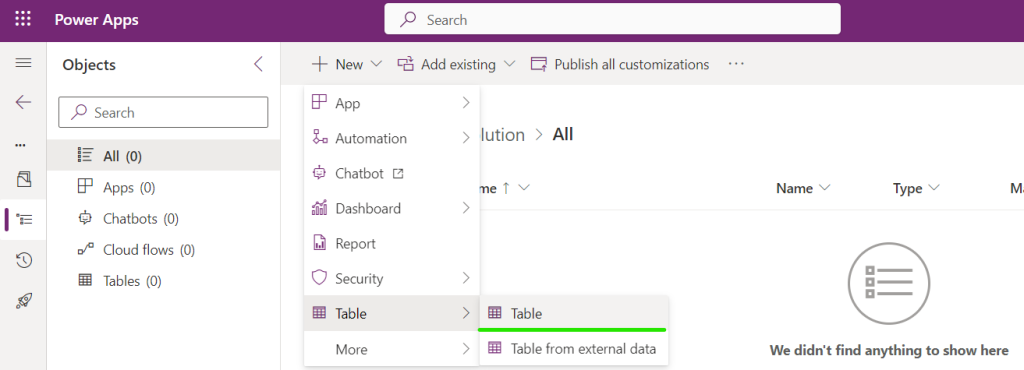
Build Tables
Steps
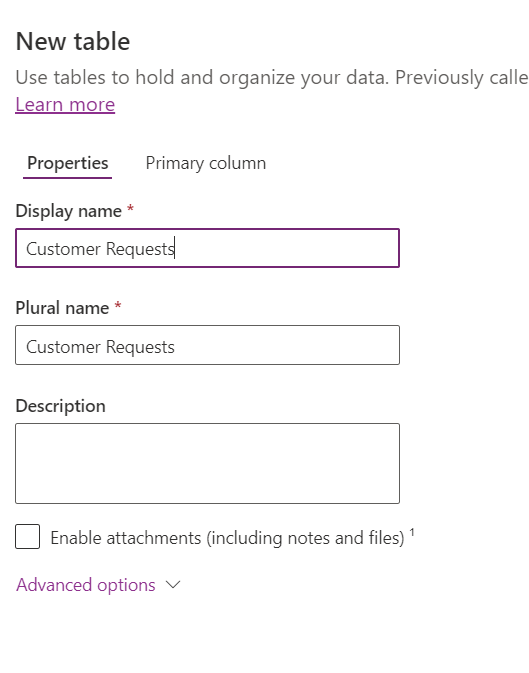
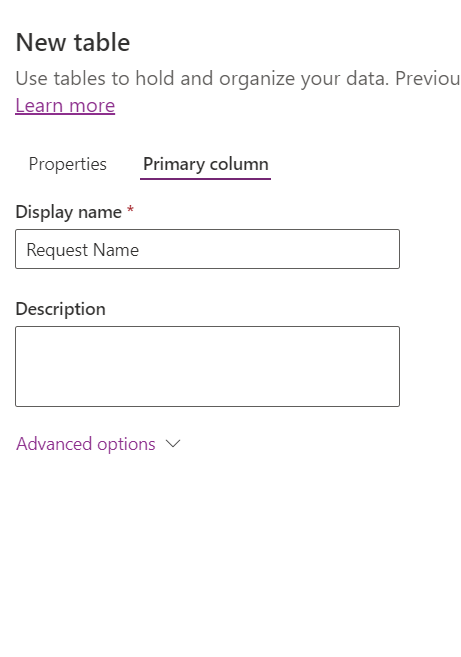
- From the newly created solution, select New, Table, Table.
- Using the ERD Diagram as a guide create the table
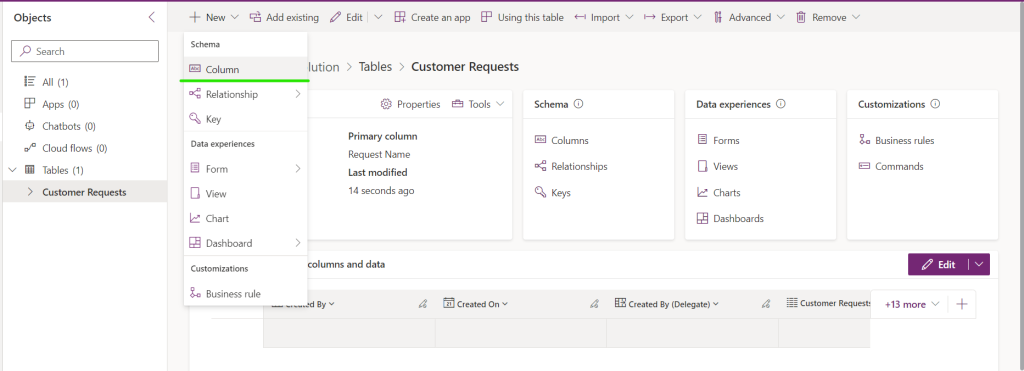
- With the newly created table selected, select New, Column
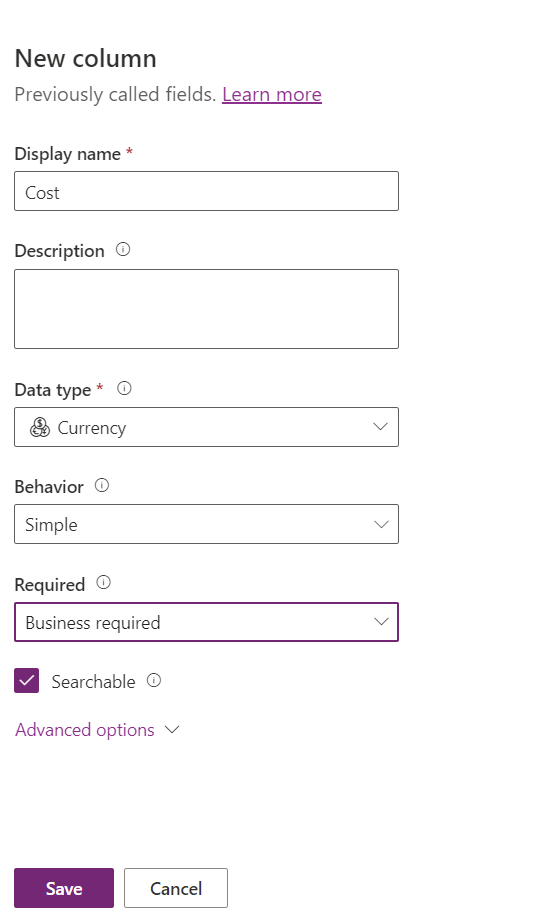
- The first column we will make is the Cost Column. Set the name to “Cost” and the type to Currency. Then press Save.
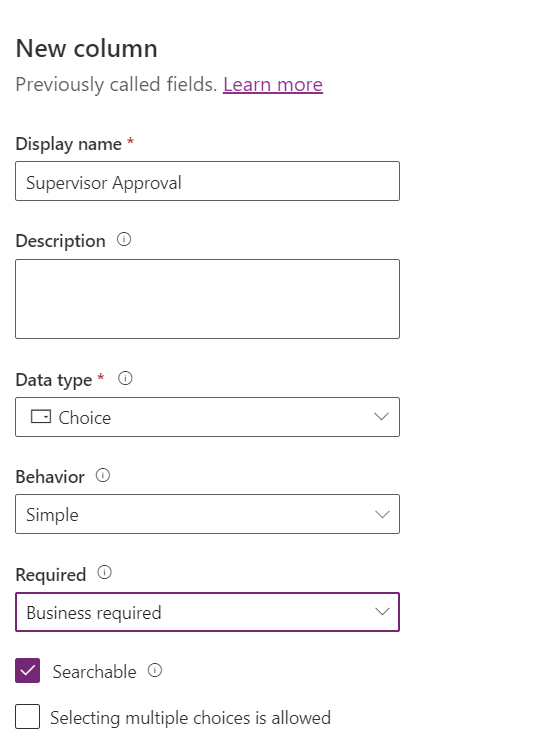
- The next column we will make is the Supervisor Approval column. This along with the Higher approval will use a global choice of “Approve, Deny, Pending”.
- After entering in the display name and the Data Type of “Choice”, select Yes to “ Sync with global choice”
- Select “New Choice” to bring up the global choice creator.

- Give the choice a distinct name and enter in the three choices
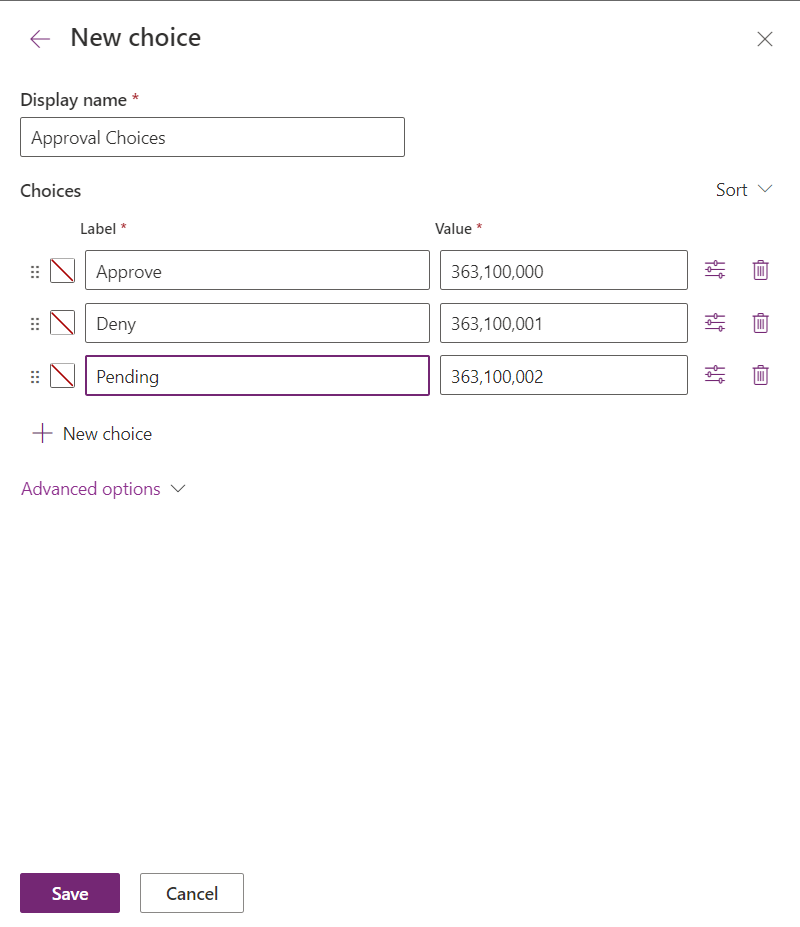
- Press Save
- This will bring us back to the column creation. In the drop down select the newly created choice.
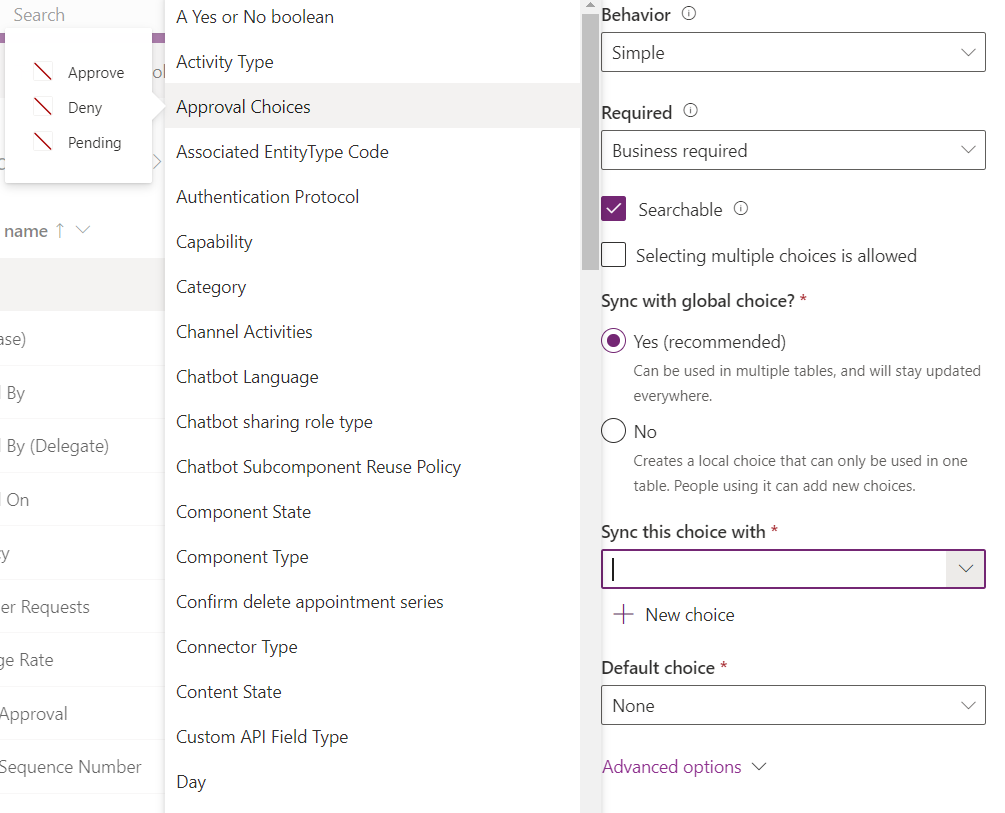
- Press Save to create the column.
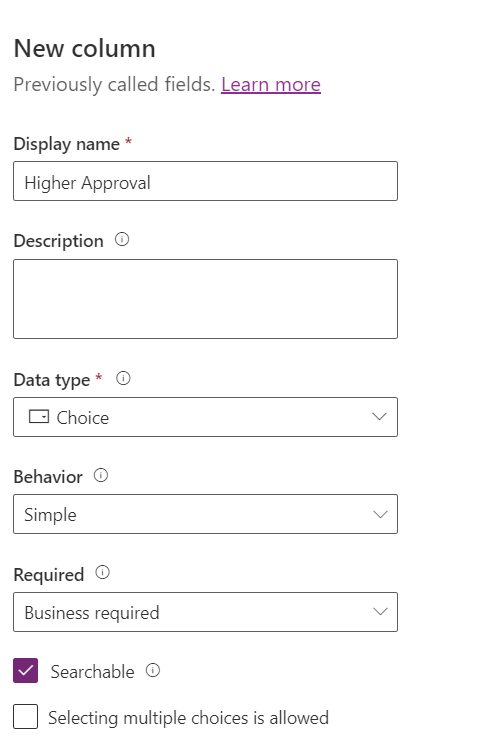
- The Higher Approval column can be created just like Supervisor Approval with one exception.
- During the design phase it was determined that only a subset of users would be allowed to see or edit this column, so Column Level Security (CLS) needs to be enabled.
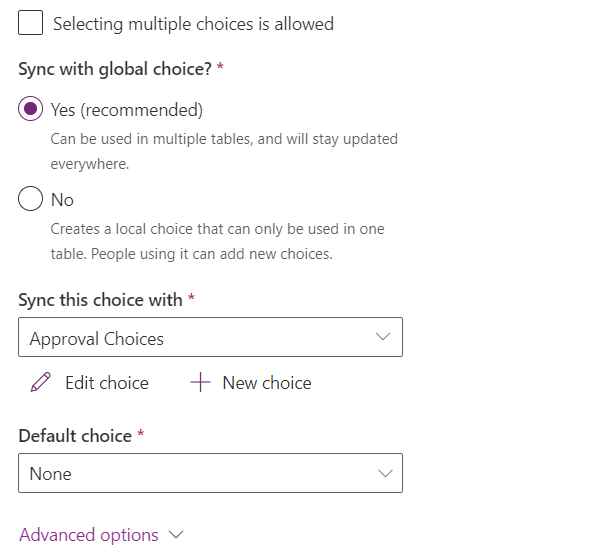
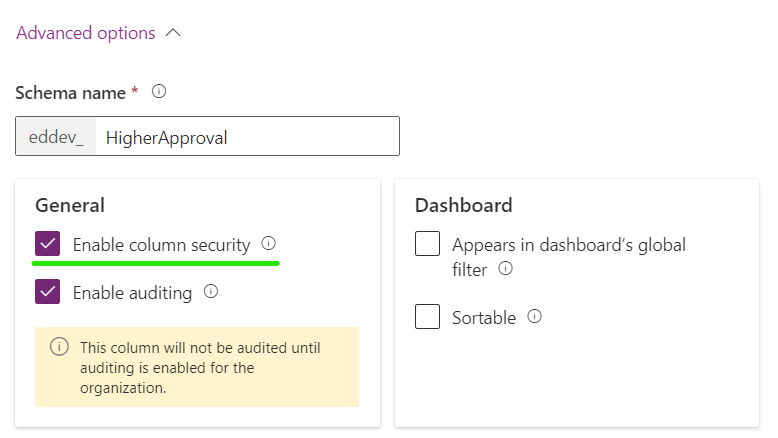
- Select Save, when completed.
- The next column to make is the Supervisor. This will be a lookup column to the Users table.
💡 Note: We do not need to make the User Column as it is already part of the table in the form of the Created By Column.

- Select Save when completed to finish creating the last column.